Fruit Handpies (Homemade Poptarts)

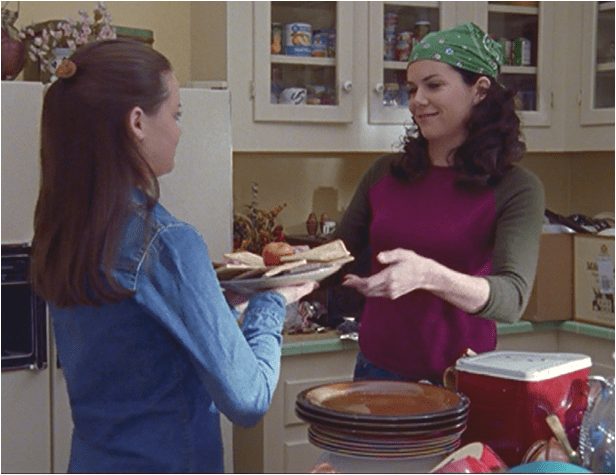
We’re on our Gilmore Girls kick here and what’s more Gilmore than poptarts? Literally nothing. One of the promo’s was literally a tray of poptarts and an apple. And we all know where that led….but let’s stay on target.

So if you like Gilmore Girls like we do, you know that poptarts are staple in the Gilmore Household.

ggpop

And like with our fried rice, we knew that when the revival came out we wanted to make as many Gilmore Girl inspired recipes that we could. And what’s more Gilmore than poptarts?

GGPop2.png

ggpop3

Of course, buying poptarts is the easy solution but making them really isn’t as hard as it seems. Trust us. We use store bought pie dough and if you really want to take the easy way out you can buy pre-made filling at the store, and frost these with store bought icing. But we suggest at least trying them once like this.

Because once you have a homemade poptart, it’s REALLY hard to go back to the store bought kind.

Homemade Poptarts

Look at those beauties. And let us be real with you, these taste as good as they look. Buttery, flaky pie dough and a warm fruit filling? Topped with a homemade glaze? Seriously what could be better than that? Besides Gilmore Girls coming back for another season? The answer is homemade poptarts!

Continue reading

S’more Brownies


img_5855

Are you missing the summer months? Are you a camper who dreams of the perfect s’more? Or are you a glamper like us who just loves the idea of a s’more? Either way these bumped up brownie s’mores are for you!

We love homemade brownies, but there is something about boxed brownies (specifically Ghirardelli’s) that really tickles our pickle. Of course, you can make your own brownies if you’re feeling especially Ina-centric that day, but boxed brownies are a perfectly perfect substitute. Amen.

Continue reading

Homemade Bagel Bites

DSC_0834

We love Bagel Bites. We know that we preach a lot about fresh foods, and only eating the best ingredients, but there is just something about Bagel Bites that are delicious and comforting. We could honestly, eat them all day long. #nojudgement

But while we do love occasionally binging on Bagel Bites, we wanted to try and make them ourselves. And the results? They were magical. Instead of mindlessly eating, these actually filled us up and kept us deliciously satiated like a good meal should.

And sure, Bagel Bites are super easy to make: open package, place on tray, cook, enjoy. But did you know that in the time it takes for Bagel Bites to warm in the oven, you could make your own homemade and mouthwatering bites? Yeah. If you’re skeptical, give these little guys a try. We promise, it’s worth the effort.

Homemade Bagel Bites

Homemade Bagel Bites

Ingredients 

  • 1 Cup Pizza Sauce (or your favorite marinara)
  • 6 Mini Bagels (Cut in half)
  • 1/4 Cup Parmesan (Grated)
  • 1/4 Cup Mozzarella (Shredded)
  • 1/2 Cup Mini Pepperonis
  • 1/4 Teaspoon Onion Powder
  • 1/4 Teaspoon Garlic Powder
  • 1/2 Teaspoon Crushed Red Peppers
  • 1/2 Teaspoon Kosher Salt

Homemade Bagel Bites

Step 1: 

Preheat your oven to 425°F.

Step 2: 

In a small bowl, mix together onion powder, garlic powder, red peppers, and salt.

Step 3: 

Cut and halve your mini bagels, and place them on foil lined cooking tray. Place in the oven and toast for about 5 minutes.

Homemade Bagel Bites

Homemade Bagel Bites

Step 4: 

While the bites are toasting, mix your season mixture and your pizza sauce.

This step is really just to up the flavor, if your sauce is already flavorful, feel free to skip this step.

Homemade Bagel Bites

Step 5: 

When the bites are finished toasting, remove them from the oven. Very carefully, begin to assemble each bagel bite, first covering the bagel with sauce, then cheese, and finally the pepperoni.

Homemade Bagel Bites

Homemade Bagel Bites

Step 6: 

Place the bites back into the oven for 7-10 minutes or until the cheese has melted.

Homemade Bagel Bites

Step 7: 

Remove from the oven and serve to the hungry masses! But remember to be careful! Hot cheese hurts!

Homemade Bagel Bites

Homemade Bagel Bites

Homemade Bagel Bites

Homemade Bagel Bites


Like our recipes? Don’t forget to like, share and follow us on Instagram, Twitter, and Facebook! #twoyoungladies

Salted Crack Ice Cream

Salted Crack Ice Cream

Remember when we we made Salted Chocolate Caramel Crack? Well, we liked it so much, that we decided to make a ice cream with it. And let us tell you, the results were absolutely fabulous!

This ice cream is definitely addictive and will please just about everyone!  Seriously though, once you make your own ice cream, it’s really hard to go back to store bought. Sure it’s a little more difficult, but knowing what you’re putting into your body is so important these days.

Salted Crack Ice Cream

Salted Crack Ice Cream

Ingredients

Step 1: 

In a large sauce pan, combine the half and half and sugar over medium heat until the sugar dissolves, remove from heat and set aside.

Step 2: 

Beat the eggs until light and fluffy, about three minutes.

Step 3: 

Very slowly, pour about half of the heated half and half mixture into the eggs whisking constantly. Pour the mixture back into the saucepan and place on the stove over medium-low heat.

Step 4: 

Next, add the heavy cream and stir until smooth. When the mixture has thickened and coasts the back of a spoon remove from the heat and transfer to glass jar.

Step 5: 

Allow to cool to room temperature then transfer to the fridge for at least 12 hours.

Step 6: 

When cool, make according to your ice cream makers manufactures instructions. During the last five minutes of churning, add the broken up Salted Chocolate Caramel Crack and continue to thoroughly mixed. Transfer to a freezer safe container and allow to set up for at least 4 hours.

Salted Crack Ice Cream

Salted Crack Ice Cream

Salted Crack Ice Cream

Salted Crack Ice Cream

Salted Chocolate Caramel Crack

It’s hump day and we have the perfect recipe to get you through your hump day blues.

Salted Chocolate Caramel Crack.

What is salted chocolate caramel crack, you might ask? It is the most delicious blend of saltines, caramel and chocolate. It’s the perfect sweet and salty snack. One thing we love here is eating salty crackers with chocolate, ever had Goldfish with Raisinettes..if not, get on that.

Once you start eating this “crack” you literally can’t stop. It’s addictive. It’s honestly kind of dangerous.

There are hundreds of recipes for this, but this is our take after we were inspired by watching the Cooking Channel’s Unique Sweets.

Salted Chocolate Caramel Crack

Salted Chocolate Caramel Crack

Salted Chocolate Caramel Crack

Ingredients

  • 1 Cup Dark Brown Sugar
  • 2 Sticks of Salted Butter
  • 1 Tablespoon Vanilla Extract
  • 1 Sleeve Saltines
  • 2 Cups Dark Chocolate Chips
  • Sprinkle of Fleur De Sel
  • Baking Spray

Step 1: 

Preheat oven to 425°F.

Step 2: 

Combine the two sticks of butter and the brown sugar in a medium sauce pan. Melt over medium-low heat. Once the mixture is melted, cook for five minutes. The mixture should be thick and bubbly.

Salted Chocolate Caramel Crack

Salted Chocolate Caramel Crack

Step 3: 

While the mixture is melting/cooking, line a sheet pan with aluminum foil and spray with baking spray. Lay the saltines down on the foil.

Salted Chocolate Caramel Crack

Step 4: 

When the butter and brown sugar has bubbled and melded together take off the heat and stir in the vanilla. Pour the mixture over the saltines and carefully spread over the crackers.

Salted Chocolate Caramel Crack

Salted Chocolate Caramel Crack

Step 5: 

Stick the saltines in the oven and cook for 5 minutes. The mixture will be very bubbly and look amazing.

Salted Chocolate Caramel Crack

Step 6: 

When the buzzer goes off, remove from the oven and sprinkle the chocolate over the caramel. Stick in the oven for 30 seconds to help melt the chocolate. Carefully spread the chocolate and allow to cool.

You can sprinkle a little Fleur De Sel on the melted chocolate for that extra salty bite!

Salted Chocolate Caramel Crack

Salted Chocolate Caramel Crack

Salted Chocolate Caramel Crack

Step 7: 

Break up the “crack” and and enjoy!

Salted Chocolate Caramel Crack

Salted Chocolate Caramel Crack

Nutella Oatmeal Risotto

Old Fashioned Oatmeal never seemed so sexy! This dish is a guilty pleasure; it’s so creamy like a risotto, the trick is to keep stirring it on medium low heat.

The texture comes out almost soufflé -like. The flavor is basically a Nutella churro, if you don’t like that, you might have burned off your taste buds.  Again, you’re welcome.

Nutella Oatmeal "Risotto"

Nutella Oatmeal Risotto

Ingredients

  • 1-2 Tbs of Nutella (don’t hesitate to use more)
  • 1/2 cup of old fashioned oatmeal
  • 3/4 cup of milk
  • 1/4 cup of water
  • cinnamon
  • vanilla extract

Step 1:

Heat up milk and water in a saucepan.

Step 2:

While it’s heating, add the Nutella, cinnamon, and vanilla. Whisk it all together.

Step 3:

When liquid is boiling, add the oatmeal. Stir constantly for 5 minutes, or until it’s thickened.

Step 4:

Plate it and dust some powdered sugar on top. It’s addictive!

Nutella Oatmeal "Risotto"

Bacon-Apple Jalapeño Poppers

Today’s recipe actually comes from one of our favorite Food Network Stars, Aarti Sequoia. These Bacon-Apple Jalapeño Poppers are the absolute best.

Anything wrapped in bacon is awesome, but the combination of spicy jalapeño filled with  green apples, green onions and cream cheese all wrapped up in salty bacon is just a slam dunk!

jalapenos

Bacon-Apple Jalapeño Poppers

Bacon-Apple Jalapeño Poppers

Bacon-Apple Jalapeño Poppers 

Ingredients 

  • 1 8oz package cream cheese (room temperature)
  • 6 green onions (roots sliced off, fine dice)
  • 1 large Granny Smith apple (finely diced)
  • Kosher Salt
  • Fresh Ground Pepper
  • 20 large jalapeños
  • 20 strips thick cut bacon (cut into halves)

Step 1: 

Preheat your oven to 375°F. Line a sheet pan with foil, parchment or a slip mat.

Step 2: 

In a large bowl, stir the cream cheese until begins to break down. Add the apples and the green onions. At this time, stir in some fresh cracked pepper and a pinch of kosher salt.

Step 3: 

Wearing a pair of gloves (THIS IS IMPORTANT), slice the jalapeños lengthwise. Next, deseed them by either cutting out the membrane or scoop it out using a small spoon.

Step 4: 

Using a pastry bag (or our handy ziplock/pastry bag tip), pipe the filling into the hollowed out jalapeños. Then, wrap the jalapeños with the bacon pieces. Secure the bacon to the jalapeños using a toothpick.

Bacon-Apple Jalapeño Poppers

Step 5: 

Line the poppers on the prepared sheet pan. Cook the poppers for 30-40 minutes, or until the bacon is cooked and browned on the bottom.

Bacon-Apple Jalapeño Poppers

Peaches says, “BACON?! You share with me?”

Bacon-Apple Jalapeño Poppers

Bacon-Apple Jalapeño Poppers

“You. Give. Me. Bacon.”

Bacon-Apple Jalapeño Poppers

Step 6: 

Allow to cool for at least five minutes, and then serve!!

Bacon-Apple Jalapeño Poppers

Bacon-Apple Jalapeño Poppers

Fried Pickles

Fried. Pickles. Get on the pickle train. Because it’s leaving for Flavor Town!

These pickles became an instant must at any gathering at our house. They’re crunchy, tangy, salty, and overall aca-amazing. (We just watched Pitch Perfect 2)

Fried Pickles

Fried Pickles

Fried Pickles 

Ingredients

  • 1 jar of Clausen Pickles, whole
  • 1 cup Beer
  • 3 cups flour (1-2 for batter, 1 for dredging)
  • Vegetable Oil
  • 1 cup of cornmeal
  • 1 teaspoon cayenne
  • 1 tablespoon garlic salt
  • 1 teaspoon season salt
  • 1 teaspoon onion powder
  • pepper

Step 1: Cut pickles into 1/2 inch to 3/4 inch thick coins. (We initially used pre-cut pickle chips, but they weren’t pickle-y enough for us so we just had to cut ourselves some beautiful pickle “steaks”). Place the pickle steaks on a paper towel and then another paper towel on top.

Step 2:  In a bowl, mix together one to two cups of flour and one bottle of beer of your choice. Whisk until combined. It should resemble a thin pancake batter. If the batter says it needs more beer, you should listen, it wants to make love to you, like you want it to.

Step 3: Add in the cayenne, garlic salt, season salt, onion powder and some pepper (“It don’t matter if it’s black or white”).

Step 4: Heat oil to 375°F. In a smaller bowl, mix one cup of flour and one cup of cornmeal with a few dashes of season salt.

Step 5: Once the oil is up to heat, take the pickle dredged it in some the flour/cornmeal mixture, then dip into the batter, then gently put it in to the oil and allow it to fry until it’s golden brown on one side then flip. Just make sure both sides get evenly golden brown.

Step 6: Take the beautifully fried pickle steaks out of their hot tub and place them on a plate with a paper towel, salt them immediately! Give them a few minutes to cool down and ENJOY!

Can be served with Sriracha or a Chipotle Mayo (or whatever floats your boat).

Fried Pickles

Snacking Cookie Dough

Need some hump day comfort; NO, we don’t mean that you dirty bird, you!  Here’s a recipe for cookie dough that you can safely snack on because we don’t use eggs, and it’ll comfort your soul long enough to get you to the weekend.

P.S. Don’t try to bake this, it’s for snacking purposes only. Make this cookie dough, popcorn and pick a show on Netflix, that’s what we call church.

Eggless Edible Cookie Dough

Eggless Edible Cookie Dough

Snacking Cookie Dough 

Ingredients

  • 1 Stick Unsalted Butter (Room Temperature)
  • 6 Tablespoons Dark Brown Sugar
  • 6 Tablespoons Bakers Sugar
  • 2 Teaspoons Vanilla Extract or Paste
  • 1 Cup plus 2 Tablespoons of AP Flour
  • 1/2 Teaspoon Baking Soda
  • 1/2 Teaspoon Salt
  • 2 Tablespoons Whole Milk
  • 3/4 Cup Dark Chocolate Chips

Step 1: 

In a stand mixer, add the butter, sugars, and vanilla and mix with a paddle attachment, beat until the mixture is smooth.

Eggless Edible Cookie Dough

Eggless Edible Cookie Dough

Step 2: 

Next, add the flour, baking soda and salt to the mixture and continue mixing until combined.

Step 3: 

Add the milk and finishing mixing until the dough is smooth.

Step 4: 

Fold in the chocolate chips with a wooden spoon. Wrap in plastic wrap and place in the fridge for up to two days or freezer for up to three months.

Eggless Edible Cookie Dough

Eggless Edible Cookie Dough