Coconut Cake with a Lemon Cream Cheese Frosting

Coconut Cake with Lemon Curd Frosting

It’s Marlee’s Birthday today (she’s 27) so everybody should celebrate with this delicious cake that we actually made for our favorite neighbor David’s birthday a few weeks ago!

We know that Coconut with Lemon sounds like a weird combination but it’s totally not! It’s actually a really pleasant and refreshing combo! This cake is super moist, and wonderful and just generally delicious. So give it a try, and let us know what you think!

Coconut Cake with Lemon Cream Cheese Frosting

Coconut Cake with Lemon Cream Cheese Frosting

Coconut Cake with Lemon Cream Cheese Frosting

Coconut Cake with Lemon Cream Cheese Frosting

Coconut Cake with Lemon Cream Cheese Frosting

Cake:

  • 3/4 pound (3 sticks) salted butter, at room temperature
  • 2 cups sugar
  • 5 extra-large eggs, at room temperature
  • 2 teaspoons Tahitian vanilla extract
  • 2 teaspoons coconut extract
  • 3 cups all-purpose flour
  • 1 teaspoon baking powder
  • 1/2 teaspoon baking soda
  • 1/2 teaspoon kosher salt
  • 1 cup milk
  • 8 ounces sweetened shredded coconut

Frosting:

  • 1 pound cream cheese, at room temperature
  • 1/2 pound (2 sticks) unsalted butter, at room temperature
  • 1 teaspoon Tahitian vanilla extract
  • 2 teaspoon lemon extract
  • 2 lemons (zested)
  • 1 pound confectioners’ sugar, sifted
  • 6 ounces sweetened shredded coconut

Step 1:

Preheat the oven to 325 degrees F on convection(it makes a difference). Use baking spray, like Pam Baking, to grease the 2 (9-inch) round cake pans.

Step 2:

Cream the butter and sugar on medium-high speed for 3 to 5 minutes, until light yellow and fluffy.

Step 3:

Crack the eggs into a small bowl, then with the mixer on medium speed, add the eggs 1 at a time, scraping down the bowl once during mixing. Add the vanilla and coconut extracts and mix well.

Step 4:

In a separate bowl, sift together the flour, baking powder, baking soda and salt.

Step 5:

With the mixer on low speed, alternately add the dry ingredients and the milk to the batter in 3 parts, beginning and ending with dry ingredients. Mix until just combined.

Step 6:

Fold in the 8 ounces of coconut with a rubber spatula.

Step 7:

Pour the batter evenly into the 2 pans and smooth the top with a knife. Bake in the center of the oven for 35 minutes, until the tops are browned and a cake tester comes out clean. Cool on a baking rack for 30 minutes, then turn the cakes out onto a baking rack to finish cooling.

Frosting!

Step 8:

In the bowl of an electric mixer fitted with a whisk attachment, combine the cream cheese, butter, lemon zest, vanilla and lemon extract and whip. Add the confectioners’ sugar and mix until smooth and tasty.

Step 9:

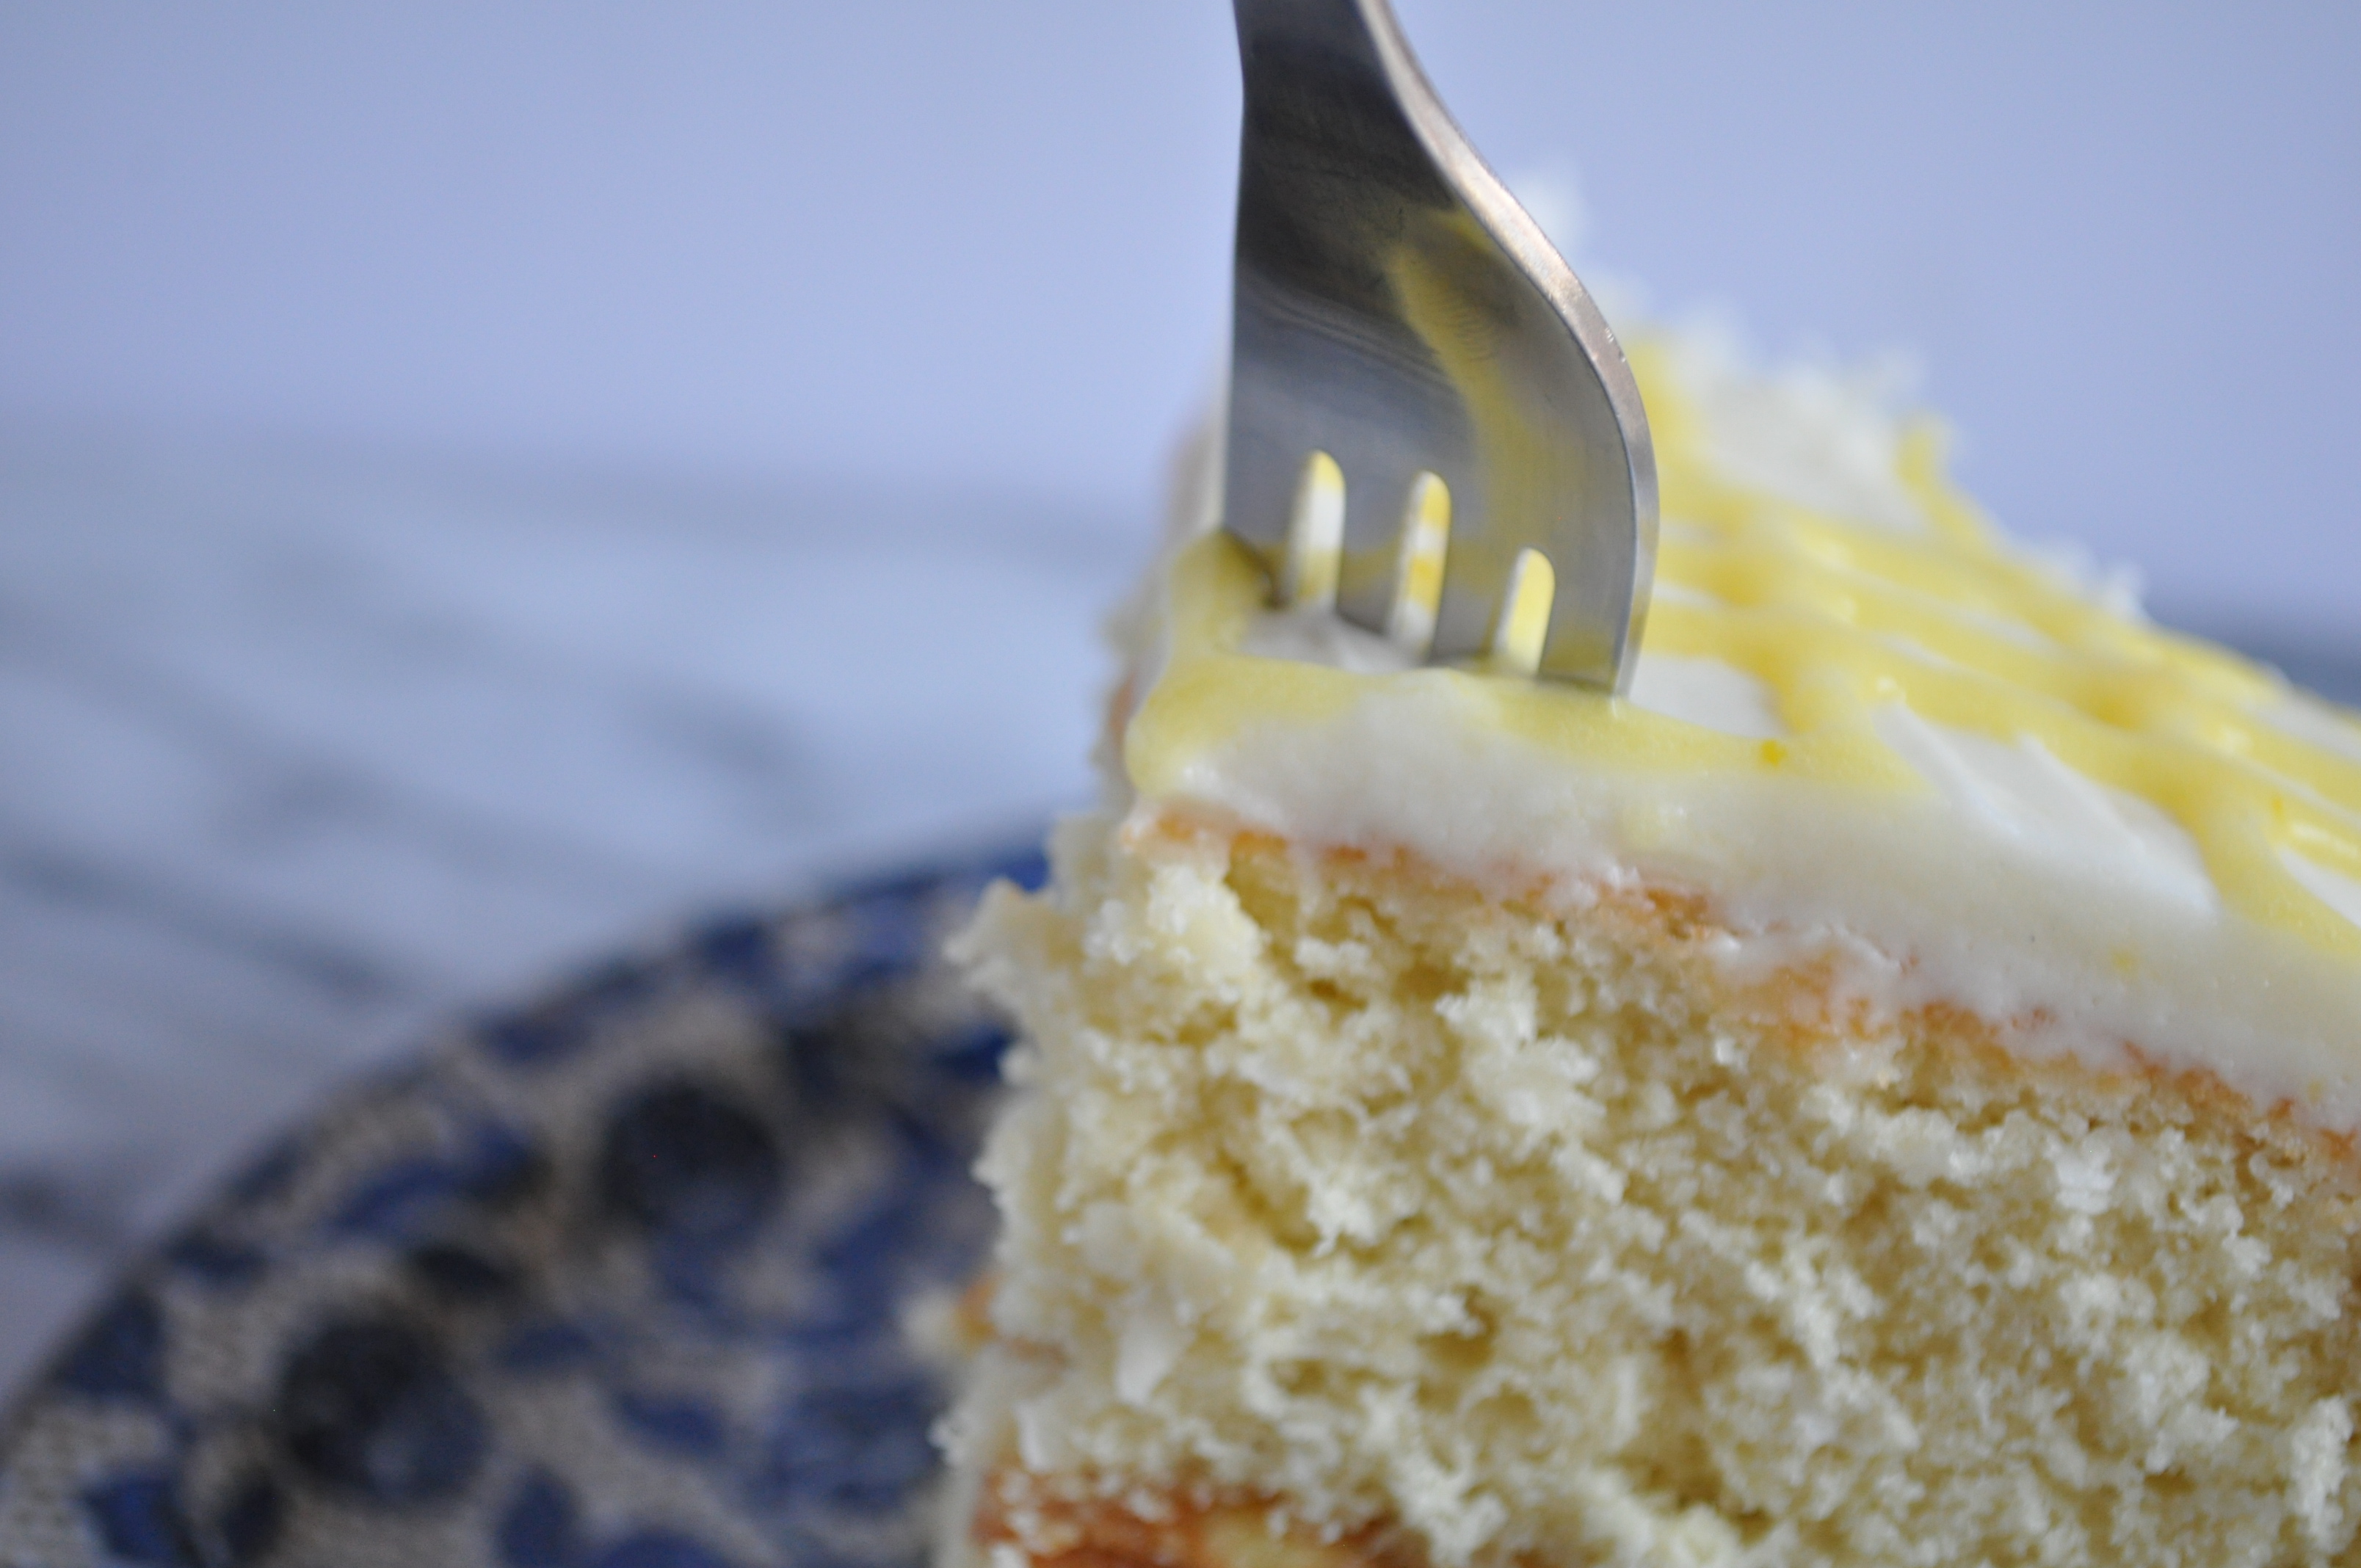
To decorate the cake, lightly press more coconut onto the sides. Serve at room temperature.

Optional: If you want to give the cake bigger lemon kick, add a layer of our beautiful lemon curd with the frosting in the middle and a design of your choice with some on top, we attempted a checker board pattern. As you can see, it’s not perfect, but it definitely tasted good.

Coconut Cake with Lemon Cream Cheese Frosting

Coconut Cake with Lemon Cream Cheese Frosting

Coconut Cake with Lemon Cream Cheese Frosting

Coconut Cake with Lemon Cream Cheese Frosting

Coconut Cake with Lemon Cream Cheese Frosting

*Adapted and inspired by Ina Garten’s recipe for Coconut Cake.

Potato-Leek Soup topped with Chopped Bacon and Chives

Potato-Leek Soup topped with Chopped Bacon and Chives

Hey there! It’s us! We’re back! And with big news, we’re finally moving! That’s why we’ve been MIA. We’ve started our packing now that so when moving day comes, we won’t be scrambling. We’re trying to make this move as easy and stress free as possible!

And since today it’s slightly cooler than normal and raining (a light sprinkle really)  we decided to post another soup recipe. I mean, it’s kind of hard to post a soup recipe when it’s 95° with 100% humidity. So this weather is a nice little reprieve from the heat, and we want to celebrate with something that will warm our souls.

Today’s recipe is one of our favorites (especially Christie’s) Potato Leek Soup topped with crispy bacon and chives. This soup is thick, creamy, and delicious, and the best part is there isn’t a lick of cream. So not only is it delicious, it’s somewhat healthy! How can you go wrong? Give this recipe a try, and don’t forget to let us know how it turns out!

Happy Cooking!

Potato-Leek Soup topped with Chopped Bacon and Chives

Potato-Leek Soup 

Ingredients

  • 4 Tablespoons Butter (Unsalted)
  • 3 Bunches Leeks (White and Light Green Parts only, sliced thinly and rinsed well)
  • 1 Large Onion (sliced)
  • 3 Pounds Potatoes, mixture of Yukon and Russet (Sliced and Peeled)
  • 4 Cloves Garlic (Minced)
  • 4 Cups Chicken Stock
  • 2 Cups Chicken Boullion (Disolved)
  • 1 Cup Water (If needed)
  • 3 Bay Leaves
  • 4 Slices Bacon (Chopped)
  • Chives (Chopped)
  • Kosher Salt
  • Fresh Cracked Pepper

Potato-Leek Soup topped with Chopped Bacon and Chives

Step 1: 

In a large pot or dutch oven, melt the butter over medium high heat.

Potato-Leek Soup topped with Chopped Bacon and Chives

Step 2: 

Add the chopped leeks and onions, and sauté until softened. Stir occasionally.  This should take about 5 minutes.

Potato-Leek Soup topped with Chopped Bacon and Chives

Potato-Leek Soup topped with Chopped Bacon and Chives

Step 3: 

Add the potatoes, garlic, kosher salt (1 teaspoon), and a few cracks of fresh pepper. Cook for about two minutes until everything is well coated.

Potato-Leek Soup topped with Chopped Bacon and Chives

Potato-Leek Soup topped with Chopped Bacon and Chives

Potato-Leek Soup topped with Chopped Bacon and Chives

Step 4: 

Add the chicken stock, chicken bouillon, water, and bay leaves. Bring to a boil, and then reduce to a simmer, stirring occasionally. Cook until potatoes are fork tender.

Potato-Leek Soup topped with Chopped Bacon and Chives

Step 5: 

Remove the bay leaves.

Step 6: 

Working in batches, blend the soup in a blender until smooth. If you want, you can can put the blended soup through a vegetable sieve to make it extra smooth.

Potato-Leek Soup topped with Chopped Bacon and Chives

Step 7: 

Return the soup to the pot and adjust the seasoning if needed. We recommend adding a dash of garlic powder, onion powder, cayenne pepper, and white pepper, but it’s really all to taste. Heat on low.

Step 8: 

Cut your bacon into slices, and place in a cold pan. Cook over a low heat until the fat has rendered out and the bacon is crispy.

Step 9: 

Top the soup with crispy bacon and chopped chives.

Potato-Leek Soup topped with Chopped Bacon and Chives

Potato-Leek Soup topped with Chopped Bacon and Chives

Recipe adapted from the Food Network Test Kitchens 

Double Chocolate Ganache Cupcakes

Double Chocolate Cupcakes

Today is apparently National Dessert Day, and to celebrate we have for you the most delicious and decadent Double Chocolate Cupcakes dipped in a luscious Chocolate Ganache. How amazing does that? And you might be thinking, wait, this sounds way too sweet, but have no fear, they’re not actually as sweet as they sound.

We’ve found (via Ina) that if you add instant coffee to chocolate, it really balances the sweetness that chocolate can give off and make the most perfect chocolatey cupcake or chocolatey dessert.

We love chocolate and once we started adding instant coffee to the chocolate, our lives were changed. For the better, obviously.

Double Chocolate Ganache Cupcakes

For Cupcakes

  • 1 Stick Butter (Salted, Room Temperature)
  • 1 Cup Bakers Sugar
  • 4 Large Eggs (Room Temperature)
  • 2 Cups Hershey’s Chocolate Syrup
  • 1 Cup AP Flour
  • 1 Teaspoon Instant Coffee Granules *
  • 1 Tablespoon Vanilla Extract

*Honestly, we LOVE coffee, so we probably put more when we make it for ourselves. Feel free to do the same. Sometimes we put up to 3 teaspoons of instant coffee.

For  Ganache Topping

  • 1/2 Cup Heavy Cream
  • 1 Cup Semisweet Chocolate Chips
  • 1/2 Teaspoon Instant Coffee Granules*

*Again, feel free to experiment by putting more coffee if your ganache. Double the dose.

coffee

Step 1:

Preheat your oven to 325°F.

Step 2: 

Next, line a muffin tin pan with paper liners.

Step 3: 

In a bowl, using an electric mixer fitted with a paddle attachment, cream together the butter and sugar until light and fluffy.

Double Chocolate Ganache Cupcakes

Step 4: 

Next, add the eggs one at a time. Mix until each is fully incorporated.

Double Chocolate Ganache Cupcakes

Step 5: 

Mix in the chocolate syrup and vanilla extract.

Double Chocolate Ganache Cupcakes

Step 6: 

Then, add the flour and coffee granules and mix until just combined. It’s very important (because Queen Ina says so) to not over beat the batter or the cupcakes with be tough little hockey pucks.

Double Chocolate Ganache Cupcakes

Double Chocolate Ganache Cupcakes

Step 7: 

Scoop the batter into the lined muffin tray and bake for about 30 minutes or as always until just set in the middle. Remember to not over bake them and let them cool throughly.

Step 8: 

While the cupcakes are cooling, make the ganache. Using a double boiler, melt the chocolate chips with the heavy cream and coffee granules. Stir until smooth and shiny, transfer to a bowl.

Double Chocolate Ganache Cupcakes

Step 9: 

When the chocolate cupcakes are cool enough to handle, dip them in the chocolate ganache.

Double Chocolate Ganache Cupcakes

Double Chocolate Ganache Cupcakes

Double Chocolate Ganache Cupcakes

Another perfect recipe adapted from Queen Ina

Basic Pie Dough

piedough

Basic Pie Dough

It’s Fall! And you know what that means? It’s PIE SESON! But if you asked us at anytime during the year, we would say it’s always pie season. It just depends on what you fill the pie with.

We have tons of recipes we want to share with you, but first we have to go back to the basics. We’ve always had a hard time with dough, especially pie dough. Most of the time it’s too crumbly and breaks apart and we end up using a pre-made crust.

And remember there is nothing wrong with using a pre-made pie crust, our personal favorite is Marie Callendars, and we always have one in the freezer for pie emergencies.

But this year is the year we decided that we were going to conquer pie crust, and we have. We fell that when you can roll the pie crust onto your rolling pin, you’ve achieved greatness. And this recipe is super simple, and one of the best we’ve found. It’s actually foolproof. If we can do it, so can you! Remember the trick is cooled flour and cooking utensils which lead to the most perfect, buttery, awesome pie dough.

Basic Pie Dough

Ingredients 

  • 12 oz. AP Flour (Chilled)
  • 1 Teaspoon Fine Salt
  • Two 4 oz Sticks of Butter (8 oz total)
  • 1/2 Cup COLD Water

Step 1: 

First things first, put your pastry cutter (or fork) and rolling pin in the freezer! Sounds weird, but it’s important!

Step 2:

Next, measure out your flour and place that in the fridge as well. Then, take your butter, cut it into medium sized cubes and place in the fridge.

Let cool for at least 15 minutes. You want the flour and the butter to be really cold!

Step 3: 

When everything is good and cool, remove the flour from the fridge and mix in the salt. Stir till combined.

Step 4: 

Next, add the cubed butter and using your cold pastry cutter (or fork) cut the butter into the flour mixture. Work the flour and butter until the pieces look no smaller than peas.

Basic Pie Dough

Basic Pie Dough

If it’s too hot, but the mixture back in the fridge and then continue working.

Step 5: 

Add the cold water to the flour and butter mixture. First using the pastry cutter to combine everything. Once it starts to form a ball you can use your hands. Make sure there are no “dry patches” or crumbly bits, if needed add an extra splash of water.

Basic Pie Dough

Basic Pie Dough

Try not to overwork the dough, because if you do, you break the butter down.

Step 6: 

Once a dough has formed, divide the the dough into two balls. Ours measured out to about 11.5 oz (give or take). Wrap the dough balls in plastic wrap and refrigerate for at least an hour.

Basic Pie Dough

If you want, you can freeze them for future use.

Step 7: 

Once the dough is chilled, flour your surface and rolling pin. Gently roll the dough out, working from the middle out. Once the dough is rolled, roll it on to your rolling pin and place on your pie dish. Trim the edges.

Basic Pie Dough

Basic Pie Dough

Basic Pie Dough

Recipes Adapted from Saturday Evening Post and The Professional Chef

TYL Tip Tuesday

This is actually one of our favorite tips because we get to use it so often. We LOVE making our tomato sauces or Roasted Tomato Basil Soup, but sometimes we don’t always have fresh tomatoes on hand. Our favorite canned tomatoes are

cento-san-marzano-peeled

Whether we use these or the store brand canned tomatoes, we add a little baking soda to the tomatoes and mix. This helps neutralize some of the acidity and let the tomatoes sing the sweet song they are supposed to! Add a teaspoon to the can and don’t be alarmed if you get some bubble up when it’s cooking.

Fun Fact (about us): This might be surprising to anyone who’s seen our recipes, but neither of us really eat tomatoes. Sure, tomato soup or tomato sauce, but whenever it’s on a sandwich or a salad it is quickly removed.

MUK

Roasted Tomato Basil Soup

Roasted Tomato Basil Soup

Another rainy day in LA?! Stop everything and post about it on Facebook, and watch out for flash flood warnings. We kid you not, this is happens every time it rains in LA. It could be sprinkling and we get, “WARNING FLASH FLOOD WARNING”. But we actually got a steady stream of rain last night, and even this morning, hopefully we’ll get more, but since it’s actually cooler, today’s recipe is perfect for a rainy day.

Roasted Tomato Basil Soup is the perfect soup to have on a rainy day. It’s healthy, it’s filling, it’s hearty, and it’s the best tomato soup you’ll ever have. Forget that watery canned soup, this is real tomato soup. Who knew tomato soup could be so delicious?

Roasted Tomato Basil Soup

Roasted Tomato Basil Soup

Roasted Tomato Basil Soup

Ingredients

  • 3 pounds ripe plum tomatoes
  • 1/4 cup plus 2 tablespoons good olive oil
  • 1 tablespoon kosher salt
  • 1 1/2 teaspoons freshly ground black pepper
  • 2 cups chopped yellow onions (2 onions)
  • 6 garlic cloves, 4 roasted and 2 minced
  • 2 tablespoons salted butter
  • 1/2 teaspoon crushed red pepper flakes
  • 1 (28-ounce) canned plum tomatoes, with their juice
  • 4 cups fresh basil leaves, packed
  • A splash of balsamic vinegar
  • 1 quart chicken broth

Step 1:

Preheat the oven to 400 degrees F.

Step 2: 

Cut tomatoes down the middle, lengthwise. Toss tomatoes in a bowl with olive oil and salt and pepper. Also toss 4 cloves on shelled garlic in the bowl. Roast both on a sheet pan for about 45 minutes.

Step 3:

Sauté the onions in a pot with some olive oil and 1 tablespoon of butter. When the onions are almost done, add in the remaining garlic and red pepper flakes.

Step 4:

Add the canned tomatoes and basil. Let it simmer for 10 minutes.  Pour in half of the quart of chicken broth.

Step 5:

Now for the stars of the show: oven-roasted tomatoes and garlic. Carefully add the tomatoes and garlic to the pot. Add everything, it’s all yummy! Bring to a boil and simmer uncovered for 30 minutes.

Step 6:

Turn off the flame and let it cool for 10 minutes. In batches, scoop, with a ladle, the soup into a blender. Blend until smooth, adding in the rest of the chicken broth or to your liking.  REMEMBER! place a kitchen towel over the blender so that you protect your face from the most delicious and painful mistake! 

Step 7:

Make it heaven! pour the now smoothly blended soup back into the pot and make any seasoning adjustments here.

Roasted Tomato Basil Soup

Roasted Tomato Basil Soup

Roasted Tomato Basil Soup

Adapted from Ina Garten’s recipe. It’s pretty similar but we added our own touches! 😉