Easy Weeknight Bolognese Sauce

Bolognese

If you didn’t already know, we love pasta. We could cook and eat pasta until we’re blue in the face, and if you didn’t guess, one of our favorite sauces is bolognese.

Most bolognese recipes take a lot of time and when you’re in a pinch the last thing you want to do is wait 3+ hours for dinner and a sauce. What’s great about our Easy Weeknight Bolognese is that you get the wonderful flavors of a classic bolognese in half the time!

And most of the ingredients are things you already have in your fridge at home. And if you’re super lazy, and don’t want to chop, you can buy those prepackaged mirepoix (meer-quaw) mixes, that include diced onion, celery, and carrots!

Now, don’t be alarmed by the amount of ingredients, those are what make this recipe great and delicious!

Easy Weeknight Bolognese

Easy Weeknight Bolognese Sauce

Ingredients

  • 1 Cup Chopped Onions
  • 1 Cup Chopped Carrots
  • 1/2 Cup Chopped Celery
  • 1 Pound Ground Beef (Or any other meat)
  • 1 Jar Your Favorite Canned Marinara Sauce (24oz)
  • 1 Cup Red Wine
  • 1/2 Cup Beef Stock
  • 2 Tablespoons Garlic (Minced)
  • 3 Tablespoons Tomato Paste
  • 1 Bay Leaf
  • 1/2 Teaspoon Dried Basil
  • 1 Tablespoon Parmesan (Grated)
  • Olive Oil
  • Kosher Salt
  • Pepper

Step 1: 

In a large pot, heat 2 tablespoons of olive oil over medium-high heat. When the oil is “dancing” add the ground meat, and season liberally with salt and pepper. Cook until no longer pink.

Easy Weeknight Bolognese

Easy Weeknight Bolognese

(Sidenote, ground meat does not photograph well…)

“De-fat” if necessary.

Step 2: 

While the meat is browning, heat one tablespoon of olive oil on high heat. Again, when the oil is “dancing” and hot, add the onion and sauté for three to four minutes.

Step 3: 

Next add the carrot and sauté for another two to three minutes. If needed add a little more olive oil. Then add the celery and garlic, and cook until garlic is fragrant.

Easy Weeknight Bolognese

Step 4: 

When the garlic is fragrant, add the onions, carrots, celery, and garlic back to the meat. Stir until combined.

Easy Weeknight Bolognese

Step 5: 

Add the wine and beef stock and raise the temperature to high. Allow the mixture to cook on high for about 15 minutes or until the majority of the liquid has cooked down.

Step 6: 

Once the liquid is cooked down, add your jar of marinara sauce and stir together. Lower the temperature to low.

We highly recommend Rao’s Homemade Sauces. Super delicious and you can read all the ingredients! But really, just pick any sauce that has the least amount of ingredients, and you know is super delicious.

Step 7: 

Next, add the tomato paste, bay leaves, parmesan, and dried basil. Stir together. Allow to cook for at least 15 minutes. Taste and add salt and pepper if needed.

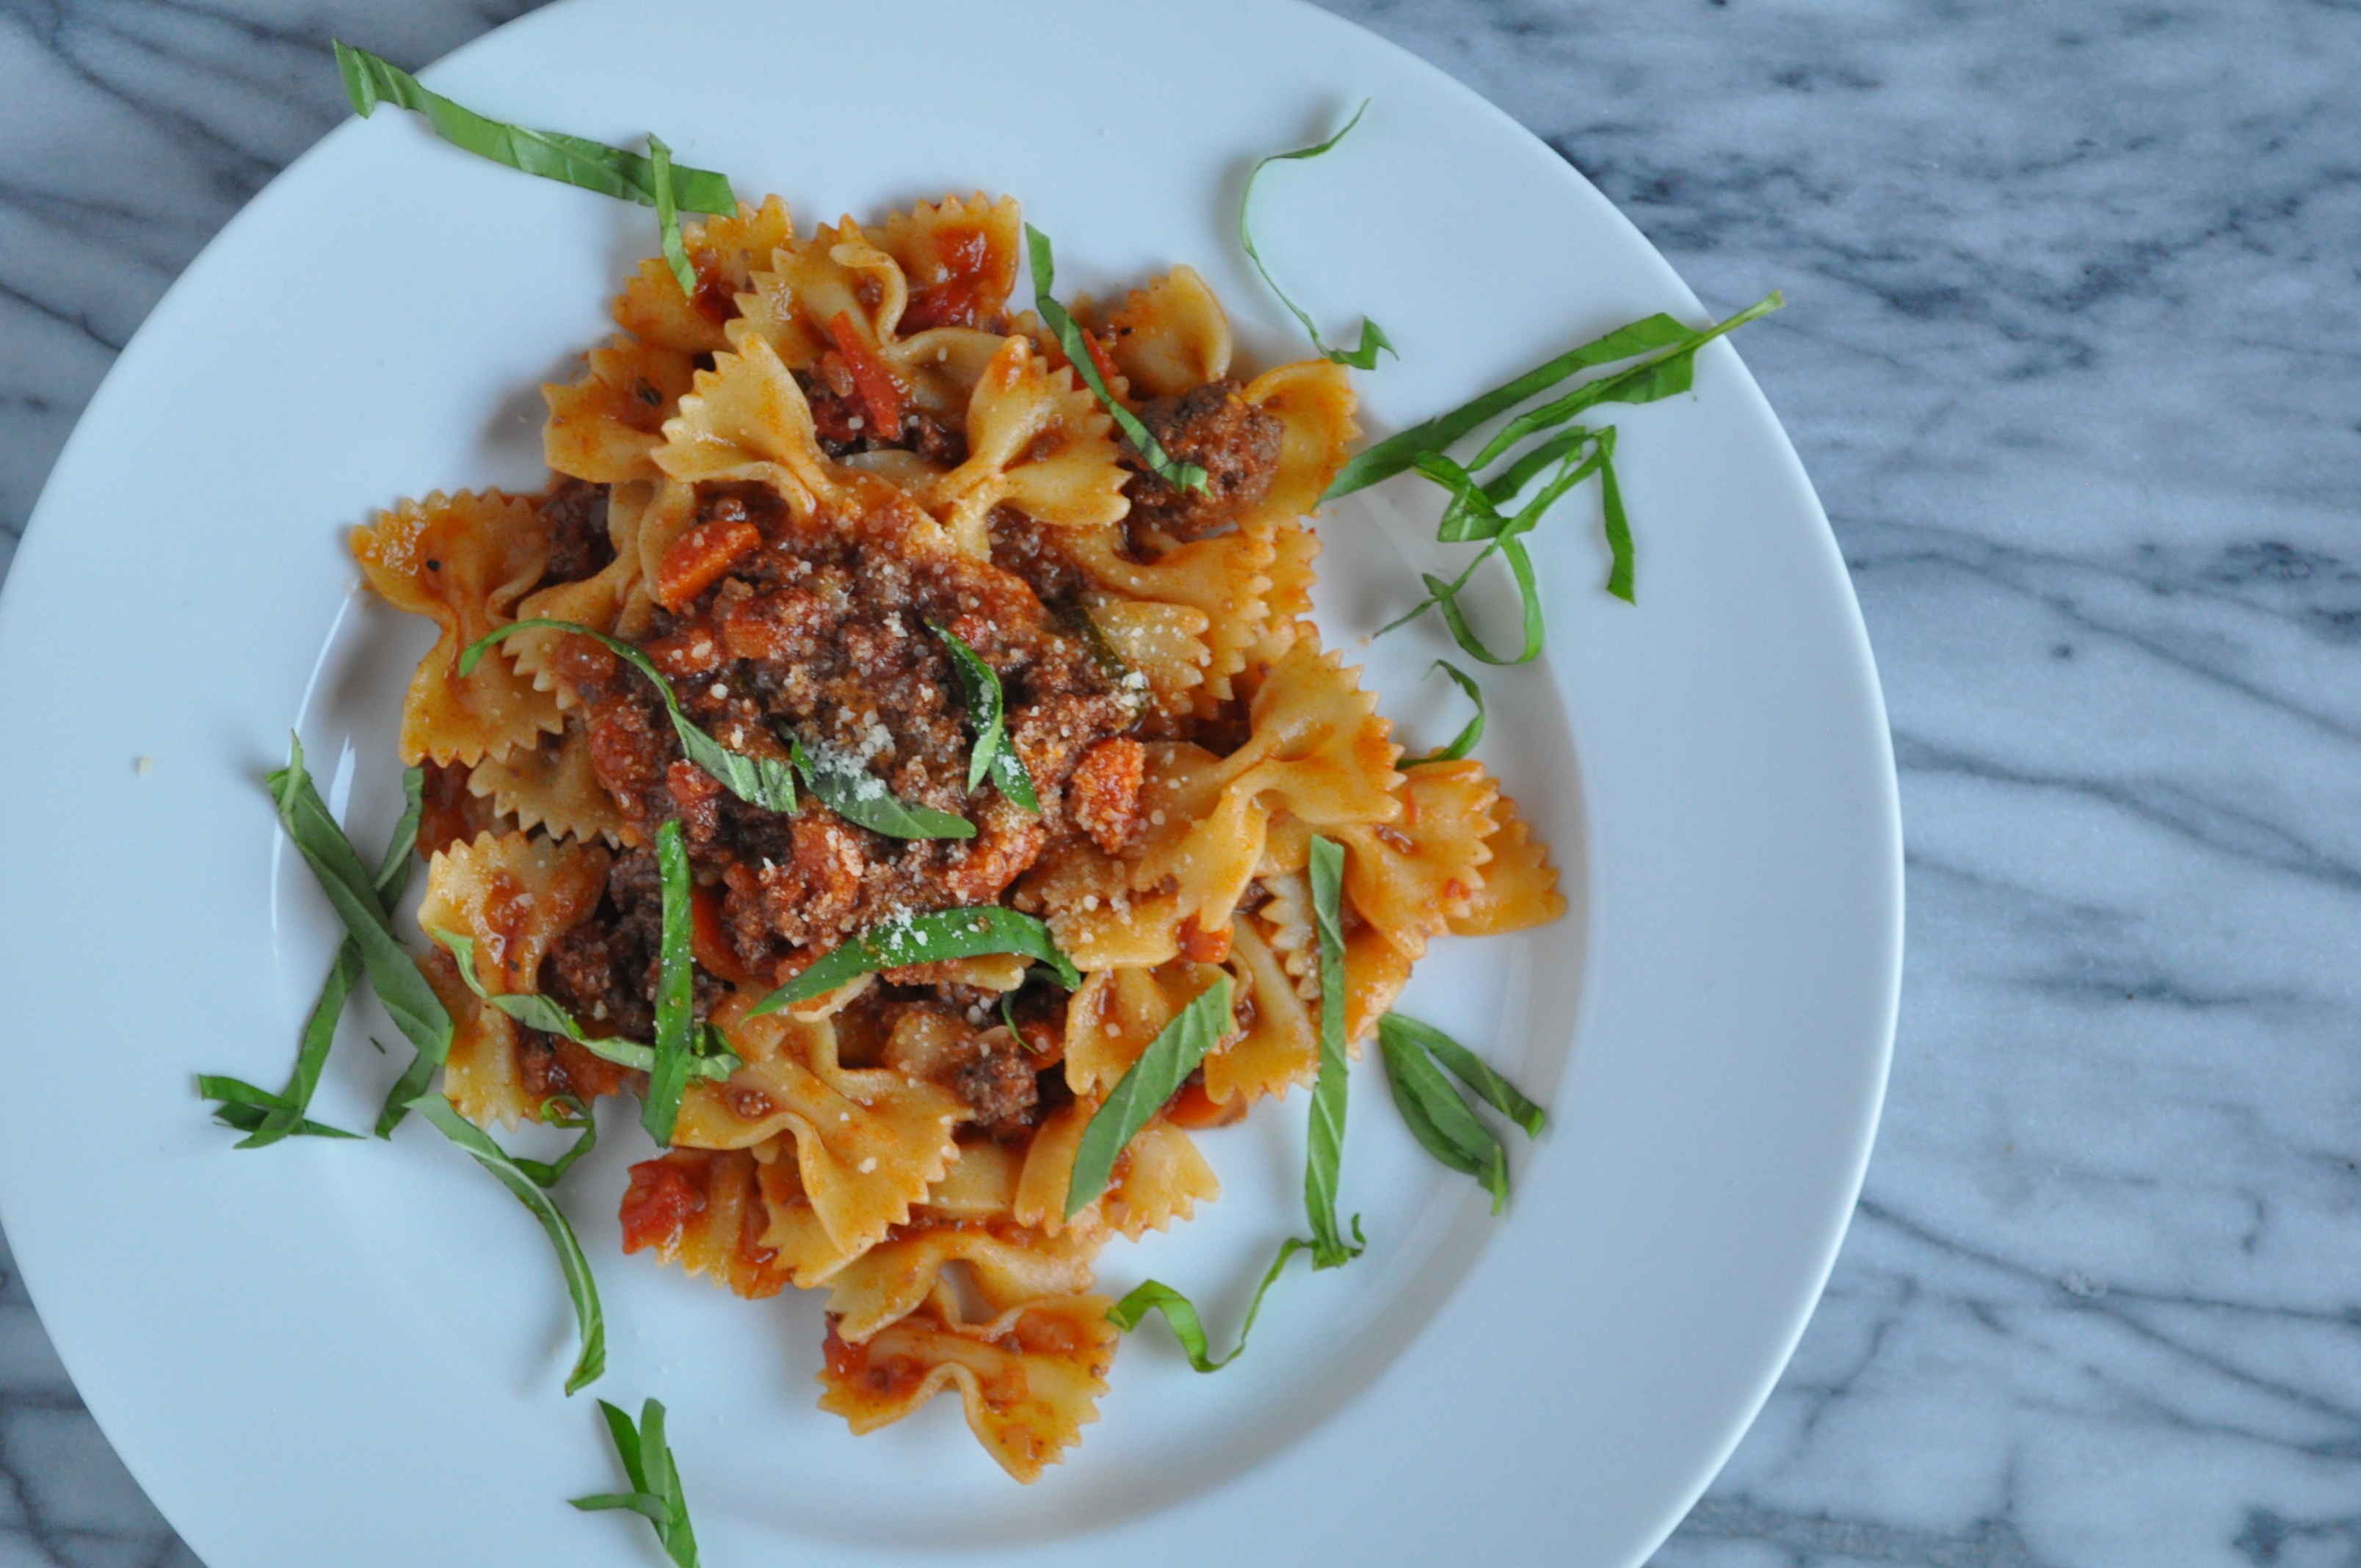
Serve with your favorite pasta and top with freshly chopped basil.

Easy Weeknight Bolognese

Easy Weeknight Bolognese

Simplistic Pesto

Simplistic Pesto

Pesto! Who doesn’t love Pesto? A simple dish that originated from Genoa, Italy where originally a paste was made from crushing cheese, garlic and herbs together.

This technique was called moretum which was more of a spread than a sauce like traditional pesto is seen today. The ancient Romans would eat this spread traditionally on bread and it was actually made in a mortar and pestle, hence the name!

In Liguria Italy (a city in Genoa) basil was a very common herb, so using it was a no brainer. There is where they added the addition of crushed pine nuts and a touch of olive oil to make more of a sauce as opposed to a spread.

In Provence, France they add fresh parsley and take out the pine nuts. This variation, is called Pistou. What’s great about pesto is all the variations there are and what you can as you make it. You can add parsley or mint to really liven up the  flavors, but today we are focusing on just simple and classy pesto.

The trick to keeping pesto green and not oxidizing, is blanching the herbs that you put in. So if you want to add parsley or mint, add them to the blanching process of Step 2.

Ingredients

  • 2 Cups Basil Leaves (packed)
  • 1 Cup Pine Nuts (toasted)
  • 6 Teaspoons Garlic (minced)
  • 1 Tablespoon Kosher Salt
  • 1 1/2 Cup Olive Oil
  • 1 Cups Grated Parmesan

Simplistic Pesto

Step 1:

Prepare a bowl of ice water, set aside.

In a large pot, bring water to a boil. When the water is boiling add a liberal amount of salt.

Step 2:

Using a fine mesh sieve, put the basil into the sieve in two batches. Lower the first batch into the boiling water and let them blanch evenly for 15 seconds. Plunge the basil into the ice water, repeat with the second batch.

Drain the basil immediately, and squeeze the excess water out of the leaves. Pat dry with a paper towel.

Simplistic Pesto

Step 3:

Roughly chop the basil and place in a food processor. Next, add the pine nuts, garlic, salt, and cheese. Pulse until blended together.

Simplistic Pesto

If you can buy this cheese, it’s really the best. It’s so smooth and velvety, perfect for giving your pesto a creamy and silky texture. 

Simplistic Pesto

Simplistic Pesto

Step 4:

Before adding the oil, remember to scrape down the sides. With the food processor on, slowly add the olive oil and allow to come together.

Simplistic Pesto

Simplistic Pesto

Simplistic Pesto

Can serve over your favorite vegetables, pasta, chicken, or as a dip.

Pesto is best served at room temperature and if served with pasta, toss the pasta and pesto immediately. No need to heat the pesto separately. 

Simplistic Pesto

Simplistic Pesto

Simplistic Pesto

Coffee and Oreo Ice Cream

Coffee and Oreo Ice Cream

Okay, we know it’s now technically fall but here in LA it’s still pretty warm, and we’re going to continue to take advantage of that warmer weather and share a few more of our favorite ice cream recipes with you. But let’s be real, we can’t wait to make fall ice cream flavors too! Pumpkin, Sweet Potato, and more!

Today’s recipe is one of our favorites. Coffee and Oreo Ice Cream. Yup. Sweet and tangy coffee with the crunchy Oreo? Perfect combination. This was a combo we used to have when we would go to Coldstone’s after school in High School.

Back in high school I (Marlee) was super resistant to the wonderful combo of coffee and Oreo, but after years of Christie making me try it, she finally wore me down, and I’ve seen the light. It’s not only her favorite, but mine too!

Since Coldstone’s has sort of fallen off the face of the earth, we figured, why not make our own? This recipe is super simple and the result is mouth-wateringly delicious.

The tip to this ice cream, is allowing the beans to steep in the warm half and half and really allowing that coffee flavor to release into it.

TYL TIP: Though you may want to, DO NOT USE ESPRESSO BEANS. The first batch we made was SO STRONG, it was hard to eat and we had to remake it with beautiful KONA COFFEE whole beans.

Coffee and Oreo Ice Cream

Coffee and Oreo Ice Cream

Coffee and Oreo Ice Cream 

Ingredients

  • 1 1/2 Half and Half
  • 1 Cup Bakers Sugar
  • 1 Cup of Whole Coffee Beans
  • 1 Teaspoon Vanilla
  • 2 Large Eggs
  • 1 Cup Heavy Cream
  • 2 Sleeves Oreos (Crushed)

Step 1: 

In a large sauce pan combine the half and half and sugar over medium heat until the sugar has dissolved. Add the coffee beans and turn off the heat, allow the beans to steep in the half and half for at least 15 minutes.

Remember, the longer the beans steep, the more coffee flavor the base will have.

Step 2: 

Next, beat the eggs until light and fluffy. About three minutes.

Step 3: 

After the coffee beans have soaked into the half and half mixture, strain the mixture and gently heat again.

When warmed, slowly pour about half of the half and half mixture into the eggs, whisking constantly to avoid scrambling. Pour back into the saucepan and whisk together over a medium-low heat.

Step 4: 

Add the heavy cream, and stir until combined. When the mixture has thickened (and coats the back of a spoon) remove from heat and transfer to a heat proof jar.

Step 5: 

Allow the mixture to cool to room temperature and then place in the fridge for at least 12 hours.

Step 6: 

When cool, make according to your ice cream manufactures instructions. While you’re waiting crush up your Oreos if you haven’t done so already.

About five minutes or so before the ice cream is finished churning, add the Oreo pieces. Transfer to a freezer safe container and allow to freeze for an additional 2 to 3 hours. Scoop that bad boy out and enjoy.

Coffee and Oreo Ice Cream

Traditional Carne Asada

Today feels like the perfect BBQ weather, so we give you the perfect food accompaniment: Carne Asada! Grill it up with a chilled beer in hand (We like Modelo) and you’ve got it made.

If you don’t have a grill you can always use a grill plan like this.

Traditional Carne Asada

Traditional Carne Asada

Traditional Carne Asada 

Ingredients

  • 2 Tablespoons Carne Asada Seasoning*
  • Juice from one Lime (fresh)
  • 1/2 Cup Orange Juice
  • 1/2 White Onion (Thinly Sliced)
  • 1 Bunch Cilantro (Chopped) *Optional*
  • 2 Pounds Skirt or Flank steak

*Equal parts: salt, garlic powder, sugar, paprika. Dashes: Cumin, oregano, black pepper, cayenne pepper. ( You can use what’s leftover as a season salt for anything else).

Step 1: 

In a small bowl, mix together lime juice, orange juice, seasoning and cilantro.

Step 2: 

In a shallow dish, place the carne asada and onions down. Cover with the marinade making sure to coat both sides of the meat. Cover and place in the fridge for a minimum of at least 45 minutes.

Remember the longer you allow it marinate, the more flavor the meat will have.

Step 3: 

Thirty to forty minutes before you plan on grilling your meat, remove from the fridge and allow to come to room temperature.

By doing this, the meat will cook more evenly.

Traditional Carne Asada

Step 4: 

Grill over medium heat for about 2-3 minutes per side. Allow to rest for five minutes before slicing and enjoying.

Eat with tortillas and all the fixings or just by itself! Just enjoy it!

Traditional Carne Asada

Coconut-Curry Corn Chowder

Coconut-Curry Corn Soup

It’s raining in LA!

For one day, and one day only we have what feels like real fall weather (or at least to LA standards) and we are going to use that to our advantage and post this delicious and warm chowder recipe.

Today’s recipe is perfect for any rainy or fall day. You can make this chowder, curl up with a good book (or movie) and enjoy the warm comforts that a hearty chowder can bring you.

What’s great about this chowder? It’s all made in one pot and you don’t even have to really think about it. You throw everything into the crockpot and let her go and 4 hours later BAM! It’s magic!

Coconut-Curry Corn Chowder

Ingredients

  • 3 bags of frozen corn
  • 2 cups of yukon potatoes, diced
  • 1 red pepper, diced
  • 1 onion, diced
  • 1 large chipotle pepper, minced
  • Juice from 1 lime
  • 14 oz. can of fire roasted tomatoes
  • 4 cups of chicken or veggie stock
  • salt & pepper
  • 1 tablespoon
  • 1 can of coconut milk
  • diced avocado (garnish on top)

Step 1:

Add 2 bags of corn, potatoes, red pepper, onion, chipotle pepper, lime juice, fire roasted tomatoes, stock, and salt & pepper to a crock pot. Mix. Cook on HIGH for 4 hours.

Step 2:

While the crock pot pool party gets started, we’ll make the coconut corn cream to thicken the chowder. In a saucepan, place the coconut milk and remaining bag of corn and curry. Add a pinch of salt and pepper. Let it simmer for 20 minutes.

Step 3:

Let coconut corn cream cool a little before blending in smaller batches, probably 2-3 batches. Pour into crock pot and let the chowder party commence!

Coconut-Curry Corn Soup

Coconut-Curry Corn Soup

Adapted from Joyful Healthy Eats!

S’mores Ice Cream

S'mores Ice Cream

While all the other cities are cooling down for fall, LA is heating up for our normal fall heatwave (we call it second summer, if you didn’t melt already…here you go). And because it’s still so hot, we’re giving you more ice cream!

It feels hot enough to roast a marshmallow in the outside air, so we thought we’d make S’mores ice cream. S’mores remind of us summer and camping. Two things we aren’t terribly found of, but we do like chocolate, graham crackers and a gloriously toasted marshmallow.

We know it seems intimidating, but making ice cream is totally worth it. Machines aren’t that expensive, especially on Amazon, and once you find a recipe that works (like all of ours) you will be Ice Cream-Making Wizards!

If you really want to be fancy, you can lightly toast the marshmallows before you add them in Step 6. 

S'mores Ice Cream

Ingredients

  • 1 1/2 Cups Half and Half
  • 1/2 Cup Bakers Sugar
  • 1 1/2 Teaspoon Vanilla Extract
  • 2 Large Eggs
  • 1 Cup Heavy Cream
  • 1 Jar Marshmallow Fluff (7 oz)
  • 1 Sleeve Graham Crackers (Crushed in to pieces)
  • Mini Marshmallows (Half a bag)
  • 1 Cup Chocolate Chips

Step 1: 

In a large sauce pan, combine the half and half and sugar over medium heat until the sugar dissolves, remove from heat and set aside.

Step 2: 

Beat the eggs until light and fluffy, about three minutes.

Step 3: 

Very slowly, pour about half of the heated half and half mixture into the eggs whisking constantly. Pour the mixture back into the saucepan and place on the stove over medium-low heat.

Step 4: 

Next, add the heavy cream and marshmallow fluff and stir until smooth. When the mixture has thickened and coasts the back of a spoon remove from the heat and transfer to glass jar.

Step 5: 

Allow to cool to room temperature then transfer to the fridge for at least 12 hours.

Step 6: 

When cool, make according to your ice cream makers manufactures instructions. During the last five minutes of churning, slowly add the crushed graham pieces, marshmallows and chocolate until combined. Transfer to a freezer safe container and let firm up for at least three hours, then enjoy!

S'mores Ice Cream

Easy Oven Pulled Pork

Easy Oven BBQ Pulled Pork

It’s a long weekend! And the last thing you want to worry about is slaving away in a hot kitchen. We have a super easy and delectable BBQ Pulled Pork, and the best part? You don’t need an smoker or a grill. All you need is an oven!

We love BBQ Pulled Pork, and this recipe is great because there isn’t much you have to do. Rub the pork down and cook that bad boy and that’s it. While you party, the oven does virtually all the work for you!

Easy Oven BBQ Pulled Pork

Easy Oven Pulled Pork 

Ingredients 

  • 1 3 to 5 pound pork shoulder/butt
  • 1 Bottle of your favorite BBQ seasoning
  • Garlic Salt
  • 1 1/2 Cups Orange Juice
  • 1 to 2 Cups BBQ Sauce
  • 1 Large Lime

Step 1: 

Rinse and dry your dry pork shoulder using paper towels.

Step 2: 

Squeeze your lime over the pork and sprinkle the entire pork with about half the bottle of seasoning and a smidgen of salt. Don’t forget to rub the seasonings into the pork, give the pork a mini massage before you let it sit overnight.

Try and let the pork marinade OVERNIGHT to get the most amount of flavor. 

Step 3: 

About an hour before you’re ready to put the pork in the oven, take the pork out and let it come to room temperature.

Step 4: 

Preheat the oven to 500°F.

Step 5: 

While the oven is heating up, mix together the orange juice and 1 cup of BBQ sauce in a large roasting pan.

Step 6: 

Place the pork shoulder in the roasting pan, and using a brush, brush the  pork with the remaining BBQ sauce.

Step 7: 

Cook the pork in the oven for 20 minutes.

Step 8: 

Remove the pork from the oven and turn the heat down to 300°F, and cover the pork. Cook for 5 to 6 hours or until the pork is tender and falling apart. Shred using two forks (or your hands if cool enough) and serve with your favorite BBQ sauce.

Easy Oven BBQ Pulled Pork

Easy Oven BBQ Pulled Pork

Salted Crack Ice Cream

Salted Crack Ice Cream

Remember when we we made Salted Chocolate Caramel Crack? Well, we liked it so much, that we decided to make a ice cream with it. And let us tell you, the results were absolutely fabulous!

This ice cream is definitely addictive and will please just about everyone!  Seriously though, once you make your own ice cream, it’s really hard to go back to store bought. Sure it’s a little more difficult, but knowing what you’re putting into your body is so important these days.

Salted Crack Ice Cream

Salted Crack Ice Cream

Ingredients

Step 1: 

In a large sauce pan, combine the half and half and sugar over medium heat until the sugar dissolves, remove from heat and set aside.

Step 2: 

Beat the eggs until light and fluffy, about three minutes.

Step 3: 

Very slowly, pour about half of the heated half and half mixture into the eggs whisking constantly. Pour the mixture back into the saucepan and place on the stove over medium-low heat.

Step 4: 

Next, add the heavy cream and stir until smooth. When the mixture has thickened and coasts the back of a spoon remove from the heat and transfer to glass jar.

Step 5: 

Allow to cool to room temperature then transfer to the fridge for at least 12 hours.

Step 6: 

When cool, make according to your ice cream makers manufactures instructions. During the last five minutes of churning, add the broken up Salted Chocolate Caramel Crack and continue to thoroughly mixed. Transfer to a freezer safe container and allow to set up for at least 4 hours.

Salted Crack Ice Cream

Salted Crack Ice Cream

Salted Crack Ice Cream

Salted Crack Ice Cream

Salted Caramel

Salted Caramel

It’s still too hot here in LA to be in the kitchen, so for today’s recipe we have a almost foolproof Salted Caramel. We’ve come across so many caramel recipes and they never turn out right, but this one, this one is AMAZING.

We’ve made this caramel multiple times and every time it’s perfect! We think it has to do with the warmed cream that you pour over the sugar and water. We promise you this recipe is nearly foolproof and everyone can make it!

Ingredients

  • 1 1/2 Cup Granulated Sugar
  • 1/2 Cup Water
  • 1 Cup Heavy Cream (Hot)
  • 2 Tablespoons Salted Butter
  • Fleur De Sel Salt

Step 1:

In a medium sauce pan over high heat, dissolve the granulated sugar and water. Stirring constantly.

During that time, if the sides of the pans have sugar that start to crystallize, use a pastry brush dipped in water to remove the crystallized sugar.

Step 2:

Continue cooking until the sugar starts to turn a deep amber color. As soon as it starts to turn, remove from the heat, immediately.

Step 3:

Very carefully and slowly, pour the hot cream into the sugar mixture whisking/stirring constantly. Don’t be alarmed when this mixture starts to bubble, just keep stirring.

Step 4:

Next, add the butter and a pinch or two of the fleur de sel salt. Stir until smooth. If desired, add 1/2 teaspoon or so of vanilla extract.

Step 5:

Move to an air tight container, and allow to cool before placing in the fridge.

Classic Chimichurri

Classic Chimichurri

Today’s recipe is a chimichurri which is traditionally a green herb sauce to serve over grilled meat. The recipe origins can be traced back to Rio de la Plata, Argentina. Traditionally, chimichurri is made by blending parsley, garlic, mint, and oregano with oil.

Before we made this recipe, we totally thought the main green herb in this dish was cilantro but after doing some research, we realized that cilantro is the last thing that would be put into this wonderful dish, and for that we are thankful! Because, if you didn’t know you know now, we really dislike Cilantro. Christie HATES it, and Marlee (me) strongly dislikes it.

A few Sunday’s back we invited our friend Claudia over dinner, and we asked her if she could have anything for Sunday dinner, what would it be. And this is what she wanted. We were a little nervous making something we’d never made before*, but then we realized, it’s just like making pesto! You allow the food processor to do all the work, and all you really have to do is season the meat, and it cook it.

*According to Christie, after proofreading this, she informed me that we actually did make a chimichurri sauce once before but she refused to eat it because there was cilantro in it. I personally don’t recall this memory, but that’s okay. Enjoy our recipe! And remember there is nothing to be afraid of in the kitchen, except maybe the garbage disposal. Those are scary.

Classic Chimichurri

Classic Chimichurri

Classic Chimichurri 

Ingredients

Chimichurri 

  • 2 Cup Flat Leaf Parsley (Fresh)
  • 1 Cup Mint Leaves (Fresh)
  • 1 Cup Oregano Leaves (Fresh)
  • 1 Cup Garlic Olive Oil
  • 4 Teaspoons Red Pepper Flakes
  • 16 Cloves Garlic
  • 2 Pounds Skirt Steak

Dry Rub 

  • 2 Tablespoons Oregano Leaves (Dried)
  • 2 Tablespoons Basil Leaves (Dried)
  • 1 Tablespoon Parsley Flakes (Dried)
  • 1 Tablespoon Thyme Leaves (Dried)
  • 1 Tablespoon Kosher Salt
  • 1/2 Tablespoon Freshly Ground Pepper
  • 1/2 Tablespoons Smoked Paprika
  • 2 Teaspoons Garlic Powder
  • 1 Teaspoon Onion Powder

Step 1: 

For the dry rub, mix all the ingredients in a small bowl and set aside. How easy was that?

Step 2: 

In a food processor combine the parsley, mint, oregano, garlic, and red pepper flakes. Pulse until broken down, 2 to 3 pulses.

Step 3: 

Next add the olive oil and pulse until smooth.

Step 4: 

Using as much dry rub as you’d like, cover your your skirt steak with your dry rub. Make sure you massage it into your meat, you want that flavor to go everywhere.

Step 5: 

Next, add about half of the chimichurri sauce and massage that into the meat as well for maximum flavor.  Cover and refrigerate for at least four hours. Remove the meat about 30 minutes before you plan on cooking.

Step 6: 

You can either grill your meat on your grill or in a large skillet on the stove. We use a stovetop griddle that lays on top of the burners. Super helpful!

Okay, so turn your grill or pan to high heat and allow to heat for a few minutes. When your cooking device is good and hot, lay your meat down and cook for about 4 to 5 minutes per side.

Step 7: 

Allow the meat to rest for at least five minutes, and then cut the meat across the grain and serve with the rest of your classic chimichurri sauce.

Classic Chimichurri

(That lovely mouth you see is our friend Claudia, anxiously awaiting our food)

Classic Chimichurri