TYL: Throwback Thursday Recipe

Today we’re going back to the beginning,the beginning of our blog that is. And every Thursday we’re going to try and post a “throwback” recipe.

The throwback recipe could be from our archives or an old recipe from the 70’s like this one, Round Steak ‘N Ravioli, that Buzzfeed found from an old cookbook.

gross

Doesn’t that look yummy? Pearl onions, zucchinis, canned raviolis, and tomato sauce.

One thing Marlee inherited from her Grandma was a ton of old cookbooks and while we were in Canada collecting them, one of her family members came up with the idea of making all those old, weird, recipes from these cookbooks for a recipe inspired Throwback Thursday.

But we’re saving those lovely recipes for the the New Year, and right now we’re going to bring you one of the first recipes that we posted here on Two Young Ladies, our delicious and satisfying, Chicken Curry Salad.

chickenthrowback

Doesn’t she look beautiful? This delicious salad is chock full of, two different kinds of apples, raisins, onions, celery, curry powder, and white wine!

If you like Gelson’s or Whole Foods Famous Chicken Curry Salad, you’ll love this recipe.

So click the link right here, for this recipe and more. Remember, if you like us or recipes, hit the subscribe button and follow us!


Ginger Crinkle Cookies

DSC_0939

Ginger Crinkle Cookies

Today on the blog we have another delicious cookie that can be made for Old Saint Nick or Chanukah Harry. This recipe comes straight from my (Marlee) Grandma’s recipe box and we’ve take this old tasty classic and updated it just a smidge.

While using dried ginger is totally okay, using additional fresh ginger really gives these ginger crinkle cookies and extra kick of awesome and punch of flavor that they were missing.

Like our sugar cookies, the longer you bake these, the crispier they turn out. We prefer these cookies to be a little softer and more chewy, so we just bake them for less. And while the cookies turn out crispier, they aren’t hard to eat and the inside is still slightly chewy. Weird, yet delicious.

This dough is super easy to make and fun for the the whole family. As a child, I fondly remember making these with my Grandma Alyce and Grandpa Fred.

Auntie Alyce’s Ginger Crinkles 

Ingredients 

  • 2/3 Cup Vegetable Oil
  • 1/2 Cup Dark Brown Sugar*
  • 1/2 Cup White Sugar*
  • 1 Large Egg
  • 5 Tablespoons Molasses
  • 1 Tablespoon Fresh Ginger (Heaping)
  • 2 Cups AP Flour
  • 1/2 Teaspoon Salt
  • 2 Teaspoons Baking Soda
  • 1 Teaspoon Cinnamon
  • 1/2 Teaspoon Ginger (Dried)
  • 1/2 Teaspoon Cloves
  • 1 Tablespoon Pumpkin Pie Spice
  • 1/4 Cup White Sugar

Step 1: 

Preheat your oven to 350°F and line a cookie sheet with parchment paper.

Step 2: 

In a medium bowl, using a hand mixer, mix together the vegetable oil and sugars.

Ginger Crinkle Cookies

Ginger Crinkle Cookies

Step 3: 

Next, add the egg and beat it in until combined.

Ginger Crinkle Cookies

Step 4: 

Stir in the molasses and fresh ginger and set the mixture aside.

Ginger Crinkle Cookies

Ginger Crinkle Cookies

Step 5: 

In a bowl, sift together the flour, salt, baking soda, cinnamon, dried ginger, and cloves.

Ginger Crinkle Cookies

Step 6: 

In two batches, add the flour mixture to the oil mixture. You can start with a wooden spoon and then move to your hands. Knead the dough until all the flour is combined.

Ginger Crinkle Cookies

Ginger Crinkle Cookies

Ginger Crinkle Cookies

Step 7: 

In a small bowl, combine the white sugar and pumpkin pie seasoning.

If you don’t have pumpkin pie seasoning, you can totally substitute it for cinnamon.

Step 8: 

For the rolling process it’s really about preference and what size cookie you like. We went for just about a tablespoon of dough, which you roll into a ball and then roll in the cinnamon sugar.

Line up the ginger dough balls, and bake for 7 to 9 minutes. If you like crispier cookies (like Auntie Alyce did) bake them 11-13 minutes.

Ginger Crinkle Cookies

Ginger Crinkle Cookies

Ginger Crinkle Cookies

Step 9:

Remove the cookies from the oven and transfer to cooling rack. Repeat Step 8 until all the dough is baked.

Ginger Crinkle Cookies

Ginger Crinkle Cookies

Ginger Crinkle Cookies

Ginger Crinkle Cookies


**If you want a softer chewier cookie do a full cup of brown sugar and exclude the white sugar. The dough will be super sticky, so add an extra tablespoon or so of flour and continue. Just be aware it won’t make the same dough as pictured!

Munchie Mondays: Sweet and Salty

DSC_0895

It’s Monday! And you know what happens on Mondays? You get a case of the Mondays! And the best way to deal with a case of the Mondays? Munchies! Munchies are the perfect cure for anything, but especially the Monday Blues.

And the perfect munchie (in our opinion) is the perfect balance of sweet and salty. And the best sweet and salty treat is,  Raisinets and Goldfish. Say whaaat? Trust us, this is the perfect afternoon munchie or after dinner snack.

We also like to refer to this dish as a “fruit and cheese” platter. You can guess why. We know it sounds strange, but trust us, this is the most excellent salty and sweet munchie.

Enjoy! Like our recipes? Subscribe, share, like, and use our hashtag #twoyoungladies to stay connected with us!

We realized after posting this, we didn’t post a “recipe” but it shouldn’t be too hard to figure out. A handful (1 cup or so) of Goldfish to a half cup of Raisinets.

If you’re feeding more, bump up the Gold Fish to 2 cups and the Raisinets to about a cup. Obviously, eat this dish in moderation. Unless your sad, or happy, or really, just eat it.

Sweet and Salty

Vanilla Bean Sugar Cookies

DSC_0843

Vanilla Bean Sugar Cookies are the perfect cookie to make for the Jolly Old Man who makes his way down your chimney every year. Wow, that’s super creepy when you say it out loud.

Either way, these cookies are super easy to make and are fun for the whole family to make! And these are the perfect cookie to decorate with family and friends. If you plan on decorating with frosting, you can leave off the optional glaze at the end.

Vanilla Bean Sugar Cookies

Vanilla Bean Sugar Cookies

Ingredients:

  • 1 Cup butter, softened
  • 1 Cup granulated white sugar
  • 2 Teaspoons vanilla paste or extract
  • 1 egg
  • 2 Teaspoons baking powder
  • 3 Cups AP flour
  • 1Teaspoon Salt

Step 1:

Preheat oven to 350.

Step 2:

In a mixer (or bowl with a hand mixer) cream softened butter and sugar until smooth and fluffy.

Step 3:

Crack egg into measuring cup and lightly beat, add vanilla into the egg, then add both to the mixer.

Step 4:

In a medium bowl, add flour, baking  and a dash of salt. Mix together and add a scoop at a time until it’s all incorporated.

Step 5:

Divide dough into four, then begin to roll it out. Roll out to desired thickness.

Thinner and the cookies will be crispier; thicker and they’ll be chewier.  We settled on 1/4 of an inch.

Another tip, if you let the dough sit for thirty minutes before rolling the cookies will be a crispier as well, and if you roll immediately they will be softer and more chewy. We’ve made these a couple of times, and the results have varied, but the taste is always delicious!

Vanilla Bean Sugar Cookies

Step 6:

Bake for about 7 minutes.

Step 7: 

Remove from the oven and allow to cool.

Optional Glaze: 

Combine the juice of half a lemon, about a cup of powdered sugar (sifted), a tablespoon of vanilla bean paste (or extract), and a splash of half and half.

Mix the ingredients together till it forms a delicious glaze. Adjust to your liking and desired to consistency. It’s really about what you like, like lemon? Add more lemon. Don’t like vanilla (craaazy!) take out some vanilla.

You get the idea! Mix and match, and if it’s too thick, had more half and half or lemon juice!

Vanilla Bean Sugar Cookies

Vanilla Bean Sugar Cookies

Vanilla Bean Sugar Cookies

Homemade Bagel Bites

DSC_0834

We love Bagel Bites. We know that we preach a lot about fresh foods, and only eating the best ingredients, but there is just something about Bagel Bites that are delicious and comforting. We could honestly, eat them all day long. #nojudgement

But while we do love occasionally binging on Bagel Bites, we wanted to try and make them ourselves. And the results? They were magical. Instead of mindlessly eating, these actually filled us up and kept us deliciously satiated like a good meal should.

And sure, Bagel Bites are super easy to make: open package, place on tray, cook, enjoy. But did you know that in the time it takes for Bagel Bites to warm in the oven, you could make your own homemade and mouthwatering bites? Yeah. If you’re skeptical, give these little guys a try. We promise, it’s worth the effort.

Homemade Bagel Bites

Homemade Bagel Bites

Ingredients 

  • 1 Cup Pizza Sauce (or your favorite marinara)
  • 6 Mini Bagels (Cut in half)
  • 1/4 Cup Parmesan (Grated)
  • 1/4 Cup Mozzarella (Shredded)
  • 1/2 Cup Mini Pepperonis
  • 1/4 Teaspoon Onion Powder
  • 1/4 Teaspoon Garlic Powder
  • 1/2 Teaspoon Crushed Red Peppers
  • 1/2 Teaspoon Kosher Salt

Homemade Bagel Bites

Step 1: 

Preheat your oven to 425°F.

Step 2: 

In a small bowl, mix together onion powder, garlic powder, red peppers, and salt.

Step 3: 

Cut and halve your mini bagels, and place them on foil lined cooking tray. Place in the oven and toast for about 5 minutes.

Homemade Bagel Bites

Homemade Bagel Bites

Step 4: 

While the bites are toasting, mix your season mixture and your pizza sauce.

This step is really just to up the flavor, if your sauce is already flavorful, feel free to skip this step.

Homemade Bagel Bites

Step 5: 

When the bites are finished toasting, remove them from the oven. Very carefully, begin to assemble each bagel bite, first covering the bagel with sauce, then cheese, and finally the pepperoni.

Homemade Bagel Bites

Homemade Bagel Bites

Step 6: 

Place the bites back into the oven for 7-10 minutes or until the cheese has melted.

Homemade Bagel Bites

Step 7: 

Remove from the oven and serve to the hungry masses! But remember to be careful! Hot cheese hurts!

Homemade Bagel Bites

Homemade Bagel Bites

Homemade Bagel Bites

Homemade Bagel Bites


Like our recipes? Don’t forget to like, share and follow us on Instagram, Twitter, and Facebook! #twoyoungladies

It’s December!!

buddy

ONLY 25 DAYS TILL CHRISTMAS! Bring on the Christmas music, sugar cookies, maple syrup, and horrible holiday movies!!!!

snowbitchesHere’s a photo of TYL in New York in 2009, we were playing in the snow, cause we obviously don’t get to do that very often!

Recipes and other big things coming soon!


Salted Caramel Ice Cream

Salted Caramel Ice Cream

It’s Friday! The best way to celebrate Friday? With ice cream. Salted Caramel Ice Cream. We can’t think of a better way to kick off the weekend. This ice cream is smooth, creamy, salty, sweet and incredibly delicious. Another thing we love about this recipe? You can name every. Single. Ingredient. Simple ingredients equal BIG FLAVOR.

Everyone asks us about making ice cream, and trust us. IT’S NOT THAT HARD. All you need is an ice cream maker. You might be asking yourselves, an ice cream maker? That’s gotta be expensive. It’s really not, they have makers as cheap as $40 on amazon. So maybe this year, ask Santa and Chanukah Harry for an ice cream maker this holiday season so you too can follow along with these seductive recipes!

You will see in the picture that when we photographed our ice cream with a maple bacon praline, for this recipe was used in our epic Pork-tastic dinner.

Salted Caramel Ice Cream

Salted Caramel Ice Cream 

Ingredients

Step 1: 

In a medium bowl, whisk together chilled cream, whole milk, vanilla and half of the salted caramel.

Step 2: 

Put in the fridge and chill until cold.

Step 3: 

Once the mixture is good a cool, pull out and give it a good stir. Pour the base into your ice cream maker and make according to your manufactures instructions.

Step 4: 

Just about when the ice cream is frozen add the remaining salted caramel (room temperature) to the mixture to create ribbons throughout the ice cream. If you don’t want ribbons you can save the remaining caramel on top of the ice cream.

Step 5: 

Transfer to a freezer safe container and chill until fully frozen.

Salted Caramel Ice Cream

Salted Caramel Ice Cream

Blueberry Compote

Blueberry Compote

Happy Monday!

Today’s recipe is a delicious and simple way to add some extra flavor into your life. Blueberry Compote! A compote is actually the French word for “mixture” and is made up of fruit in a sugar syrup. Apparently, a compote dates back all the way to Medieval Europe, where they would chill the compote and eat it at the end of the meal.

So, here’s the history on blueberries. Apparently, they are native to North America, along with the cranberry and concord grape. The Native American people considered the blueberry a gift from the Great Spirit and they should, they’re amazing! When the New England settlers arrived, they tried and failed at the agriculture game because it wasn’t local…Sound familiar? Anyway, the Native Americans taught the settlers how to grow corn and blueberries, among other staples in the Native American diet of the time. Not only did they like eating blueberries, but they had many uses for them such as medicinal uses and dyes. So hail to the Blubs!

You can add this compote to just about anything. You can add it to greek yogurt, a crazy PB and Jelly sandwich, top your favorite ice cream, cupcakes, cakes, pancakes, use it as a topping for waffles, you can use it on just about anything. And it’s absolutely delicious, and of course, not overly sweet.

You can also make this ahead and then freeze for a later day. It’s really up to you.

Remember to let us know what you think by leaving us a comment here on using the #twoyoungladies hashtag on Twitter and/or Instagram.

Blueberry Compote

Blueberry Compote

Blueberry Compote

Ingredients: 

  • 1 18oz Container Fresh Blueberries
  • 1/2 Cup Orange Juice
  • 1/2 Cup White Sugar
  • 1/2 Teaspoon Vanilla Extract
  • 1/4 Teaspoon Cinnamon
  • 3 Tablespoons Cornstarch
  • 1/4 Cup Cold Water

Step 1: 

In a medium sauce pan, combine the blueberries, sugar, vanilla, cinnamon and orange juice. Bring to a boil.

Blueberry Compote

Step 2: 

In a small bowl, mix together the cold water and cornstarch.

Step 3: 

Add the cornstarch mixture to the blueberries. Mix until combined.

Step 4: 

Cook over low heat until the mixture has thickened and coats the back of a spoon, about 3 to 4 minutes.

Blueberry Compote

Step 5: 

Remove from the heat and and let cool to room temperature.

Can be served on anything, it’s that good!

Blueberry Compote

Blueberry Compote

Blueberry Compote

Blueberry Compote

Chicken and Asparagus Stir Fry

Chicken Asparagus Stir Fry

Happy Monday! You know what the best way to start your Monday off is? With our Chicken and Asparagus Stir Fry Bowl. This is the perfect meal after a weekend of fun, and questionable food choices. This bowl is packed full of flavors and will keep you going for hours!

Sriracha, agave, and soy give this bowl an extra punch of flavor that really makes in unique and special. Give this tasty bowl a try and let us know what you think here or using the hashtag #twoyoungladies

Chicken and Asparagus Stir Fry

Chicken and Asparagus Stir Fry

Chicken and Asparagus Stir Fry

Chicken and Asparagus Stir Fry

Ingredients

  • 2 Tablespoons Soy Sauce
  • 2 Tablespoons Agave
  • 2 Tablespoons Sriracha
  • 1 Teaspoon Crushed Red Peppers
  • 2 Boneless, Skinless Chicken Breasts
  • 2 Tablespoons Olive Oil,
  • 1 Bunch Asparagus (Trimmed and Cut to bite sized pieces)
  • 4 Teaspoons Garlic (Finely chopped)
  • 1 Teaspoon Toasted Sesame Oil

Chicken and Asparagus Stir Fry

How beautiful is this asparagus? We love asparagus!

Step 1:

In a small bowl, mix the soy sauce, agave, sriracha, and red pepper flakes.

Step 2:

Cut the chicken into bite sized pieces, and place in a large bowl or ziplock bag.

Chicken and Asparagus Stir Fry

Step 3:

Cover the chicken with about half of the soy mixture. Reserve the rest. Cover the chicken and sit in the fridge for at least thirty minutes (the longer the better) for the flavors to meld.

Chicken and Asparagus Stir Fry

Step 4:

Twenty minutes before you plan on cooking dinner, remove the chicken from the fridge.

Step 5:

In a large skillet, heat 1 tablespoon of the olive oil over a medium high heat. Saute the asparagus and saute until just under done, you don’t want to over cook them. Remove the asparagus from pan. About two to three minutes.

Chicken and Asparagus Stir Fry

Step 6:

Add the remaining oil, and cook the chicken pieces until almost cooked completely through, which is about five minutes.

Chicken and Asparagus Stir Fry

Chicken and Asparagus Stir Fry

Step 7:

Add the chopped garlic, and saute for about 60 seconds. Add the asparagus back into the pan, and the reserved marinade. Cook for another two minutes and just before you take it off the heat, add the 1 tablespoon of toasted sesame oil.

Chicken and Asparagus Stir Fry

Chicken and Asparagus Stir Fry

Serve immediately over rice and top with toasted sesame seeds.

Chicken and Asparagus Stir Fry

Chicken and Asparagus Stir Fry

Chicken and Asparagus Stir Fry

Browned Butter Sweet Potato Pie Squares

Sweet Potato Squares

It’s finally fall in Los Angeles, and you know what that means? It’s below 80 (just barely) degrees and everyone is bringing out the scarves, boots, and puffy coats. We like to call it wishful coating, and if we wear coats and cold weather clothes it will magically become cooler. We girls can dream, right?

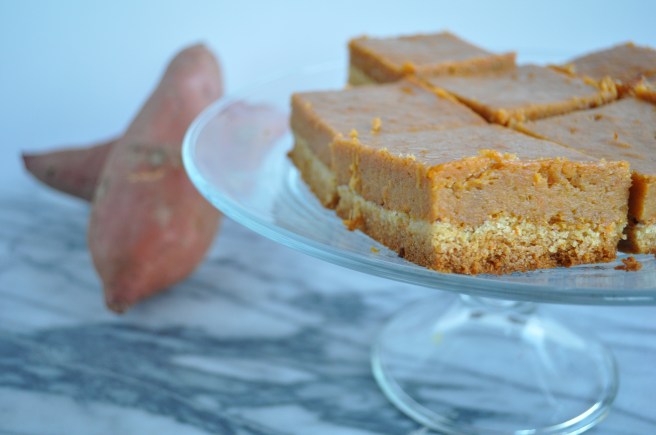
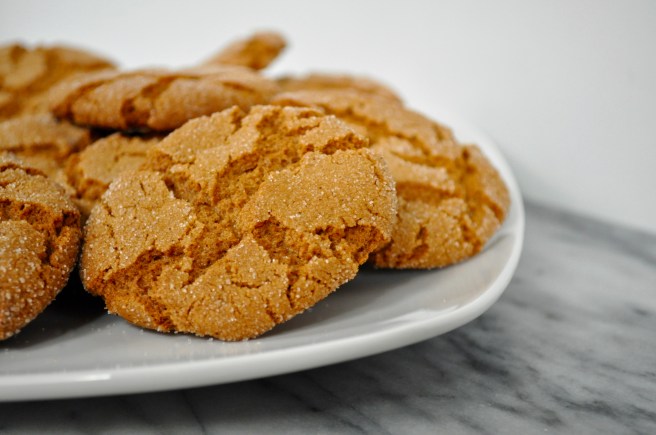
And you know what fall also means? Pumpkins. Tons and tons of pumpkins, but here at TYL, we like to mix things up and go off the beaten path. We dare everyone to swap out pumpkins for sweet potatoes. Sweet Potato is one of our favorites, and once we opened the door to Sweet Potato land, we were changed ladies.

Before we get to the recipe, we also want to thank everyone for sticking with us during these past few weeks. We finally moved to our own apartment, and it’s perfect! Big things are happening here and we can’t wait to share them with you. But for now, lets get to today’s  recipe! Browned Butter Potato Pie Squares! These are a take on a recipe from Paula Deen, but we fall-ifed it!

Please let us know what you think, and if you make it and post it tag us with #twoyoungladies.

Happy Fall Everyone!

Browned Butter Sweet Potato Pie Squares

Browned Butter Sweet Potato Pie Squares 

Ingredients

  • 1 Package Cake Mix (Yellow or Spice Cake)
  • 1 Large Egg
  • 1 Stick Butter (Melted)
  • 1 8oz Package Cream Cheese (Softened)
  • Sweet Potatoes (One pound, peeled and chopped)
  • Orange Juice
  • Water
  • 1 Stick Butter (Melted)
  • 1 Teaspoon Maple
  • 1 Teaspoon Vanilla
  • 3 Eggs
  • 8oz of Powdered Sugar
  • 1 Teaspoon Cinnamon

Browned Butter Sweet Potato Pie Squares

Step 1: 

Preheat your oven to 350°F.  Grease a 13×9 pan with cooking spray.

Step 2: 

In a medium saute pan, brown your first stick of butter.

If you’re unfamiliar with browning butter, click here.

Browned Butter Sweet Potato Pie Squares

Step 3:

In a medium sauce pan, place your cut and peeled sweet potatoes and covers with a mixture of orange juice and water. Cook until sweet potatoes are fork tender.

Drain and mash until smooth, set aside to cool.

Browned Butter Sweet Potato Pie Squares

Step 4: 

In a medium bowl, mix together, your cake mix, one egg, and your browned butter. Mix well.

Browned Butter Sweet Potato Pie Squares

Browned Butter Sweet Potato Pie Squares

Step 5: 

Pat the dough into your greased 13×9 pan, using your hands until it forms an even layer on the bottom of the pan and set aside.

Browned Butter Sweet Potato Pie Squares

Step 6: 

In a large bowl, beat together the softened cream cheese and mashed sweet potatoes until smooth.

Browned Butter Sweet Potato Pie Squares

Browned Butter Sweet Potato Pie Squares

Step 7: 

Brown the next stick of butter.

Step 8: 

Next add the eggs, vanilla, maple, and the browned butter and then beat together.

Browned Butter Sweet Potato Pie Squares

(The first time we made this, we didn’t brown the second stick of butter. The second time, we did.)

Step 9: 

Finally, add the powdered sugar, cinnamon, and a pinch of slat and mix well.

Browned Butter Sweet Potato Pie Squares

Step 10: 

Scrapping down the sides of the bowl, spread the pumpkin mixture evenly over the cake batter crust. Bake for 45 to 50 minutes.

Step 11: 

Allow to cool completely and then cut into squares and serve with fresh whipped cream or powdered sugar.

Browned Butter Sweet Potato Pie Squares

Browned Butter Sweet Potato Pie Squares

Browned Butter Sweet Potato Pie Squares

Browned Butter Sweet Potato Pie Squares

Recipe adapted from Food and The Butter Queen, Paula Deen.
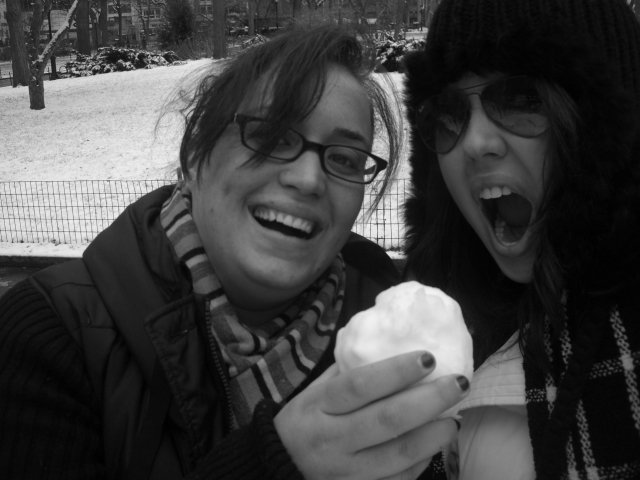