Large Sugar Cookies

It’s January! A new year! And that means new recipes. And the best way to start out the new year is with a delicious sugar cookie. One of our favorite types of cookie is those perfectly large, round, sugar cookies you find in the bakery. For this recipe we actually doubled the original recipe so there would be more cookies to enjoy. You can certainly cut this recipe in half but if you want more cookies, we suggest going  with the recipe as it’s written below.

The lemon zest is also totally optional but we recommend leaving it in because it gives the cookies a little extra ‘something’. And if you have Meyer Lemons, that’s even better. You know how much we love our Meyer Lemons here. Get zesty!

Also a fun fact about Sugar Cookies, they date back all the way to the 1700’s in Nazareth Pennsylvania, where German Protestant settlers created a round, buttery, cookie known as the Nazareth Cookie. This cookie actually became the ‘official’ cookie of the State of Pennsylvania. And then in the 1930’s sugar cookies gained popularity in America when children would leave them out for Santa as a midnight treat. Lucky Santa! Let us know how you enjoy these sugar cookies!

Continue reading

Throwback Thursday: Breakfast Oatmeal Cookies

Hey guys, what a week. First we lose David Bowie, and now Alan Rickman? And let’s not forget Lemmy Kilmister and Natalie Cole. A very sad start to 2016.

On a lighter and happier note, we have a sweet and delicious start to your Thursday, with our second Throwback Thursday recipe: Breakfast Oatmeal Cookies! These cookies are like eating your morning oatmeal in cookie form. Unfortunately, they’re not as healthy as normal oatmeal, but it’s just as delcious and who really cares. Live a little. Have a cookie for breakfast. We won’t tell if you won’t.

Breakfast Cookies

Remember, when making these cookies, under-bake them just a smidge for a gooey and delicious oatmeal texture. But better, because it’s in a cookie. And who doesn’t love cookies for breakfast.

CLICK HERE for this recipe. And remember if you like our recipes, subscribe, like, share, and you can find us on Facebook and Instagram!

americassweethearts

Enjoy!

Snacking Cookie Dough

Need some hump day comfort; NO, we don’t mean that you dirty bird, you!  Here’s a recipe for cookie dough that you can safely snack on because we don’t use eggs, and it’ll comfort your soul long enough to get you to the weekend.

P.S. Don’t try to bake this, it’s for snacking purposes only. Make this cookie dough, popcorn and pick a show on Netflix, that’s what we call church.

Eggless Edible Cookie Dough

Eggless Edible Cookie Dough

Snacking Cookie Dough 

Ingredients

  • 1 Stick Unsalted Butter (Room Temperature)
  • 6 Tablespoons Dark Brown Sugar
  • 6 Tablespoons Bakers Sugar
  • 2 Teaspoons Vanilla Extract or Paste
  • 1 Cup plus 2 Tablespoons of AP Flour
  • 1/2 Teaspoon Baking Soda
  • 1/2 Teaspoon Salt
  • 2 Tablespoons Whole Milk
  • 3/4 Cup Dark Chocolate Chips

Step 1: 

In a stand mixer, add the butter, sugars, and vanilla and mix with a paddle attachment, beat until the mixture is smooth.

Eggless Edible Cookie Dough

Eggless Edible Cookie Dough

Step 2: 

Next, add the flour, baking soda and salt to the mixture and continue mixing until combined.

Step 3: 

Add the milk and finishing mixing until the dough is smooth.

Step 4: 

Fold in the chocolate chips with a wooden spoon. Wrap in plastic wrap and place in the fridge for up to two days or freezer for up to three months.

Eggless Edible Cookie Dough

Eggless Edible Cookie Dough

The BEST Chocolate Chip Cookies

As you know, we LOVE cookies. And we are always looking for the best cookie recipe and when we stumbled upon Hugs and Cookies recipe, we had a good feeling.

The secret to her perfect cookies, is raising the base temperature of the oven and then lowering it as soon as the cookies go in to the oven. Because of this, it makes the outside of the cookie slightly crunchy and the inside is a gooey mess of deliciousness. When the cookies come out of the oven, they almost look like they are blushing. I kid you not. Blushing cookies. You will thank us, and then you will thank Hugs and Cookies, we certainly do! These are by far some of the best chocolate chip cookies we have ever made!

The BEST Chocolate Chip Cookies


The BEST Chocolate Chip Cookies

Ingredients 

  • 2 1/4 cups AP flour
  • 1/2 teaspoon kosher salt
  • 1/2 teaspoon baking soda
  • 12 tablespoons butter (room temperature)
  • 1 cup dark brown sugar
  • 1/2 cup granulated sugar
  • 1 tablespoon vanilla extract
  • 1 egg
  • 1 egg yolk
  • 1 cup bittersweet or dark chocolate chips (Ghiradhelli or Guittard)

The BEST Chocolate Chip Cookies

Step 1: 

Sift together the AP flour and baking soda, and then mix in the salt. Stir until combined and set aside.

Step 2: 

In a mixer (stand or by hand) mix together the butter and sugars until blended.

The BEST Chocolate Chip Cookies

The BEST Chocolate Chip Cookies

The BEST Chocolate Chip Cookies

The BEST Chocolate Chip Cookies

Step 3: 

Add the vanilla, egg and yolk and blend until creamy.

The BEST Chocolate Chip Cookies

The BEST Chocolate Chip Cookies

Step 4: 

Mix in the flour mixture until just combined. Do not over-mix! Next stir the chocolate chips in by hand.

The BEST Chocolate Chip Cookies

The BEST Chocolate Chip Cookies

The BEST Chocolate Chip Cookies

Step 5: 

This step is important: you must chill your dough for at least 3 hours. We know, it sucks to wait, but this step really does pay off. Go watch a movie or binge watch your favorite show. OR clean the kitchen, or you can do what Peaches did and take a nap. Also, don’t forget to cover your dough with plastic wrap.

Sleepy Peep

The BEST Chocolate Chip Cookies

Step 6: 

While the dough is chilling, line your cookie sheet with parchment paper. We always spray the sheet with Pam first and then line with parchment, this prevents the parchment from moving around.

Step 7: 

Just before the dough is nice and chilled preheat your oven to 425°. Using a scoop or a spoon measure out 1.5 to 2 ounce cookie balls. Place on the sheet.

The BEST Chocolate Chip Cookies

Step 8: 

As soon as you put the cookies in the oven immediately lower the temperature to 375°. According the the original recipe (and us as testers) this sets a “base” heat, that cooks the cookie quicker but giving it that nice crust on the edge and keeps the inside moist and gooey! Bake for 9 minutes to 10 minutes. We always say under-bake your cookies just a little bit, that really helps achieve that gooey center.

The BEST Chocolate Chip Cookies

Step 9: 

When the cookies are done, let them cool on the cookie sheet and then transfer them to a cooling rack. Repeat step 8 until all the dough is baked. Remember to raise the temperature back to 425° and lower when the cookies are in the oven.

The BEST Chocolate Chip Cookies

The BEST Chocolate Chip Cookies

The BEST Chocolate Chip Cookies


“Breakfast” Oatmeal Cookies

There’s nothing better than a simple oatmeal cookie. As you’ve kind of gathered, we love cookies, and are always finding the best cookie recipes, it’s an addiction!

We definitely like to “under bake” these cookies. When you try these warm, it’s like eating your morning oatmeal. Only better. So. Much. Better. Warm gooey, delicious oatmeal cookies.

Breakfast Oatmeal Cookies


What You Need

  • Cookie Sheet
  • Parchment Paper
  • Pam
  • Ice Cream Scoop

Ingredients

  • 1 cup butter (room temperature)  
  • 1 cup granulated sugar
  • 1 cup dark brown sugar
  • 2 eggs (room temperature)
  • 1/2 teaspoon vanilla extract
  • 1 1/2 teaspoon maple extract
  • 2 cups AP flour
  • 2  teaspoons cinnamon
  • 1 teaspoon baking soda
  • 1 teaspoon salt
  • 3 cups old fashioned oats
  • 1 cup chocolate chips (optional)

Step 1: 

Preheat the oven to 375°.

Step 2:

In a stand mixer or using a hand mixer, mix together butter and sugars. Until smooth and creamy.

Step 3:

Beat in the eggs one at a time, and then the vanilla and maple.

Step 4: 

In a medium bowl swift together the flour, cinnamon, baking soda, and then stir in the salt.

Step 5: 

In a separate bowl mix together flour, cinnamon, baking soda, salt, and oats together. Once thoroughly mixed, add the dry ingredients to the wet mixture. If using chocolate chips, mix them in now.

Step 6: 

For best cookie results, we always recommend cooling the dough before using. If you’re in a hurry and want the cookie NOW, pop the dough in the freezer for about thirty minutes. If you have the time, stick the dough in the fridge for 2-3 hours.

Step 7: 

When the dough is nice and chilled, scoop out your dough into balls. Cook for 10 to 12 minutes. These cookies are best a little underdone, the gooeyness is very similar to your morning oatmeal, only better. Let cool on cookie sheet for 3 minutes, and then remove to cooling rack.

** Instead of large cookies, you can do teaspoons instead of scoops. If doing teaspoons, baking 8 to 10 minutes. That should yield waaaaay more cookies than what we made.

Breakfast Oatmeal Cookies

Breakfast Oatmeal Cookies


Browned Butter Stuffed Cookies

So as you know, we love cookies, so we though the best way to start your Saturday is make these delicious Browned Butter Stuffed Cookies. And you can stuff these bad boys with just about anything. Okay, maybe not anything, but you can can experiment and see what tickles your fancy.

We reccomend Nutella, Cookie Butter and Peanut Butter. Those are front runners in this household. But like the recipe states you can try a whole bunch of different “stuffers”. Let us know, what you’re favorite is!

Browned Butter Stuffed Cookies

Browned Butter Stuffed Cookies


What you need? 

  • Measuring Cups
  • Measuring Spoons
  • Saute Pan
  • Stand Mixer or Hand Mixer
  • Medium Sized Bowls
  • Wooden Spoon
  • Cookie Sheet x2
  • Wax Paper
  • Parchment Paper
  • Pam (optional)

Dry Ingredients 

  • 2 1/14 cups AP flour
  • 1 1/4 cup brown sugar
  • 1/4 cup bakers sugar
  • 1 1/4 teaspoons baking soda
  • 1/2 teaspoons kosher salt
  • 1 cup dark chocolate chunks or chips
  • Fleur De Sel (for sprinkling)

Wet Ingredients 

  • 1 cup (2 sticks) unsalted butter (cut into pieces)
  • 1 tablespoon plain greek yogurt
  • 1 large egg
  • 1 egg yolk
  • 1 tablespoon vanilla bean paste (or extract)
  • A jar of your favorite spreadable (cookie butter, peanut butter, jam, marshmallow fluff, Nutella ect.)

**These cookies are big, so if you want a lot of cookies, double the recipe. Especially if you’re a nibbler like me.

Step 1: 

In a medium bowl, whisk together the flour, baking soda, and salt and set to the side.

Step 2: 

In a heavy bottom sauce/sautee pan (if you can, avoid non-stick) turn your burner to medium heat and put the butter in the pan, stirring constantly. The butter will foam, but keep stirring. If you see brown specks, don’t be alarmed, that’s a good thing! When the butter goes from a butter smell, to a nutty aroma, then your butter is browned.

Step 3:

Immediately remove from the heat, and pour into a heat proof bowl. Stick in the freezer for no more than five minutes to cool. Remember, you don’t want it to harden, just cool!

Step 4: 

In a stand mixer, cream together butter and both sugars until well blended.

Step 5: 

Next beat in the egg, the yolk, vanilla paste (or extract) and yogurt until fully incorporated.

Step 6: 

Slowly, add the dry ingredients until just combined. I know you want to keep mixing, but don’t. It’s okay if still see some flour.

Step 7: 

Fold in dark chocolate chunks.

Step 8: 

If you want successful cookies, my mom says to always chill your dough! You have two choices, you can either stick it in the fridge for 1.5-2 hours or stick it in the freezer for 30 minutes. I personally do the freezer.

Step 9:  

Depending on which chilling method you use, turn the oven on just before the cookies are ready to come out. Preheat oven to 350°.

Step 10:

Line a cookie sheet with wax paper, and take your favorite spreadable (I’m partial to Cookie Butter and Nutella) and drop little dollops onto the wax paper. Put in the freezer to harden them. This will make putting them in the dough, much easier. I did about quarter sized dollops, but the sizes varied. You can also do this before you make the cookies, so they dollops are fully frozen. It’s much easier to work with frozen filling, than just chilled. Trust me.

Step 11:

While the dough is still chilling, take your cookie sheet and line them with parchment paper. Christie uses cooking spray to keep the parchment paper on the tray. Hello life hack!

Step 12: 

Once the dough is fully chilled, and the dollops are firm enough to handle. It’s time to start making the cookies! Take some dough (we eyeballed it) and flatten it out in your palm, about 4 inches across, and place a dollop of Cookie Butter or Nutella in the center. Close the cookie up, and gently roll it.

Step 13: 

On a cookie sheet lined with parchment paper, place the delicious dough balls down. I only did six cookies total, three on each side or two down. It all depends on how you look at it. But no more than six on a cookie sheet. These bad boys spread.

Step 14:

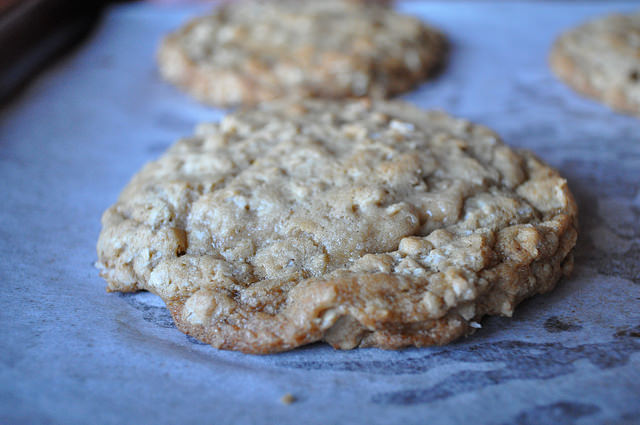
Bake the cookies for about twelve minutes, slightly browned on the edges, but still slightly “underdone” in the middle. I like chewy on the middle, but crunchy on the outside. I always slightly undercook my cookies to achieve this.

Step 15: 

As soon as the cookies are out of the oven, sprinkle with fleur de sel and let cool on cookie sheet for about two minutes. This allows the salt to really stick to the melted chunks. DO IT.

Step 16: 

The cookies are delicate so gently remove them from the cookie sheet, and place on a cooling rack. Repeat until all the dough is gone. Oh, and then eat. Cause they’re delicious.


Browned Butter Stuffed Cookies

Today’s recipes were inspired by Ambitious Kitchen, Kirbie’s Kitchen, and love & olive oil.

Sarah’s Gluten Free, Dairy Free, Vegan Cookies

It’s seems that almost everywhere you go, especially in LA, there is some new diet fad, or something everyone is giving up for “health reasons”. But what about when you’re actually allergic to gluten? Or dairy? Are you just supposed to just sit idly by and not enjoy desserts? No! You can make these delicious little morsels of goodness!

We have to admit, when Sarah first offered to bring over a dessert that was vegan friendly, we were definitely skeptical. Most vegan food almost always “taste vegan” but these cookies definitely don’t taste vegan. They’re super addictive and not overly sweet. These bad boys will go very quickly, trust me.

DSC_0025


Sarah’s Gluten Free, Dairy Free, Vegan Cookies                                                                                                                   (Don’t Be Scared, we promise they’re flavorful!) 

What You Need?                                                                                                     

  • Measuring Cups
  • Measuring Spoons
  • Whisk
  • Wooden Spoon
  • 2 Medium to Large sized Bowls
  • 2 Cookie Sheets
  • Parchment Paper

Dry Ingredients 

  • 1 cup All purpose Gluten Free Flour
  • 1 1/2 cup Almond Meal Flour
  • 1/4 Flaxseed Meal
  • 1/4 Cornstarch
  • 1 1/2 Teaspoons Xantham Gum
  • 1 Teaspoon  Baking Soda
  • 1 Teaspoon  Salt
  • 1 cup of Sugar (You can experiment with different kinds)
  • Dark Chocolate Chips (Morsels) (as much or as little as you like)

Wet Ingredients 

  • 6 Tablespoons of Unsweetened Apple Sauce
  • 3/4 cup of Coconut Oil Melted (plus)
  • 2 Tablespoons of Coconut Oil
  • 2 Tablespoons of Vanilla

Step 1:

Preheat the Oven to 325

Step 2:

Put all Dry Ingredients in bowl one and all the wet in bowl two. Whisk Dry together and the Wet together but separately.

Step 3:

Slowly fold the dry ingredients in to the wet using the wooden spoon. Do this a little at a time to ensure all ingredients are mixed thoroughly.

Step 4:

Fold in the Dark Chocolate. Eat some of the dark chocolate. It’s good for you.

Step 5:

Wet your hands to avoid sticking to the batter and make about 1 and 1/2 inch balls. Place them 1 1/2 to 2 inches apart on the baking sheet. Bake for around 12 to 15 mins.

Step 6:

URgEnT! EAT THEM NOW!!! FUCK COOLING!!

DSC_0029


These cookies may seem scary, but we promise you, you will enjoy these! At least give em’ a try and let us know what you think. It’s embarrassing the amount of cookies I’ve eaten (Marlee).

They’re soft, chewy, and literally one of the most perfect cookies we’ve ever had! And because they’re gluten free, dairy free and vegan, that basically makes them healthy, right?